View Source Complex Arguments
In preparation for supporting comments on our blog, let's create users. We're building a modern mobile first blog of course, and thus want to support either a phone number or an email as the contact method for a user.
We want to support the following mutations.
Support creation of a user with their email address:
mutation CreateEmailUser {
  createUser(
    contact: { type: EMAIL, value: "foo@bar.com" }
    name: "Jane"
    password: "hunter1"
  ) {
    id
    contacts {
      type
      value
    }
  }
}
And by using their phone number:
mutation CreatePhoneUser {
  createUser(
    contact: { type: PHONE, value: "+1 123 5551212" }
    name: "Joe"
    password: "hunter2"
  ) {
    id
    contacts {
      type
      value
    }
  }
}
To do this we need the ability to create nested arguments. GraphQL has input objects for this purpose. Input objects, like regular object, contain key value pairs, but they are intended for input only (you can't do circular references with them for example).
Another notion we'll look at here is an enumerable type. We only want to support contact
types "email" and "phone" at the moment, and GraphQL gives us the ability to
specify this in our schema.
Let's start with our :contact_type Enum. In blog_web/schema/account_types.ex:
enum :contact_type do
  value :phone, as: "phone"
  value :email, as: "email"
end
We're using the :as option here to make sure the parsed enum is represented by a string
when it's passed to our controllers; this is to ease integration with our Ecto schema
(by default, the enum values are passed as atoms).
Note
The standard convention for representing incoming enum values in GraphQL documents are in all caps. For instance, given our settings here, the accepted values would be
PHONEandWhile the
enummacro supports configuring this incoming format, we highly recommend you just use the GraphQL convention.
Now if a user tries to send some other kind of contact type they'll get a nice error without any extra effort on your part. Enum types are not a substitute for modeling layer validations however, be sure to still enforce things like this on that layer too.
Now for our contact input object.
In blog_web/schema/account_types.ex:
input_object :contact_input do
  field :type, non_null(:contact_type)
  field :value, non_null(:string)
end
Note that we name this type :contact_input. Input object types have
their own names, and the _input suffix is common.
Important
It's very important to remember that only input types---basically scalars and input objects---can be used to model input.
Finally our schema, in blog_web/schema.ex:
mutation do

  #... other mutations

  @desc "Create a user"
  field :create_user, :user do
    arg :name, non_null(:string)
    arg :contact, non_null(:contact_input)
    arg :password, non_null(:string)

    resolve &Resolvers.Accounts.create_user/3
  end

end
Suppose in our database that we store contact information in a different database table. Our mutation would be used to create both records in this case.
There does not need to be a one to one correspondence between how data is structured in your underlying data store and how things are presented by your GraphQL API.
Our resolver, blog_web/resolvers/accounts.ex might look something like this:
def create_user(_parent, args, %{context: %{current_user: %{admin: true}}}) do
  Blog.Accounts.create_user(args)
end
def create_user(_parent, args, _resolution) do
  {:error, "Access denied"}
end
You'll notice we're checking for :current_user again in our Absinthe
context, just as we did before for posts. In this case we're taking
the authorization check a step further and verifying that only
administrators (in this simple example, an administrator is a user
account with :admin set to true) can create a user.
Everyone else gets an "Access denied" error for this field.
Note
To see the Ecto-related implementation of the
Blog.Accounts.create_user/1function and the (stubbed) authentication logic we're using for this example, see the absinthe_tutorial repository.
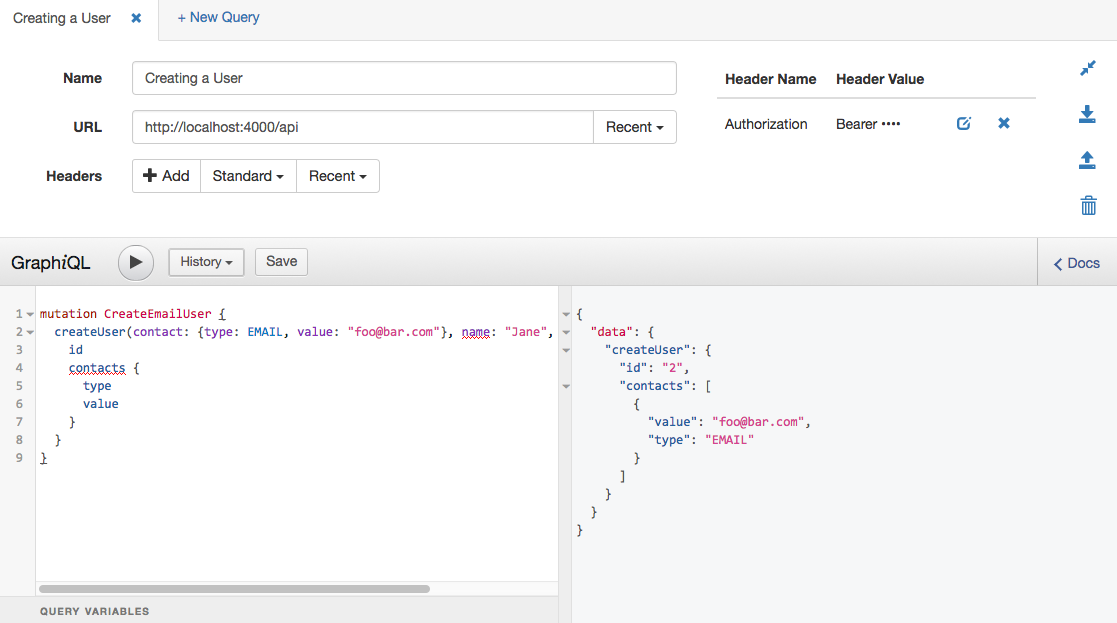
Here's our mutation in action in GraphiQL.

Note
Note we're sending a
Authorizationheader to authenticate, which a plug is handling. Make sure to read the related guide for more information on how to set-up authentication in your own applications.Our simple tutorial application is just using a simple stub: any authorization token logs you in the first user. Obviously not what you want in production!
next-step
Next Step
Now let's wrap things up.
