Running Crawly as a standalone application
An approach that involves abstracting all scraping tasks into a separate entity (or service), thereby allowing you to extract your desired data without the need for Crawly in your mix file.
In other words:
Run Crawly as a Docker container with spiders mounted from the outside.Getting started
Here we will show how re-implement the example from Quickstart, to achieve the same results with a standalone version of Crawly.
Make a folder for your project:
mkdir myprojectMake spiders folder inside the project folder:
mkdir ./myproject/spidersCopy the spider code inside a file in a folder defined on the previous step
myproject/spiders/books_to_scrape.ex:defmodule BooksToScrape do use Crawly.Spider @impl Crawly.Spider def base_url(), do: "https://books.toscrape.com/" @impl Crawly.Spider def init() do [start_urls: ["https://books.toscrape.com/"]] end @impl Crawly.Spider def parse_item(response) do # Parse response body to document {:ok, document} = Floki.parse_document(response.body) # Create item (for pages where items exists) items = document |> Floki.find(".product_pod") |> Enum.map(fn x -> %{ title: Floki.find(x, "h3 a") |> Floki.attribute("title") |> Floki.text(), price: Floki.find(x, ".product_price .price_color") |> Floki.text(), url: response.request_url } end) next_requests = document |> Floki.find(".next a") |> Floki.attribute("href") |> Enum.map(fn url -> Crawly.Utils.build_absolute_url(url, response.request.url) |> Crawly.Utils.request_from_url() end) %{items: items, requests: next_requests} end endNow create a configuration file using erlang.config format: https://www.erlang.org/doc/man/config.html
For example:
myproject/crawly.config[{crawly, [ {closespider_itemcount, 500}, {closespider_timeout, 20}, {concurrent_requests_per_domain, 2}, {middlewares, [ 'Elixir.Crawly.Middlewares.DomainFilter', 'Elixir.Crawly.Middlewares.UniqueRequest', 'Elixir.Crawly.Middlewares.RobotsTxt', {'Elixir.Crawly.Middlewares.UserAgent', [ {user_agents, [<<"Crawly BOT">>]} ]} ]}, {pipelines, [ {'Elixir.Crawly.Pipelines.Validate', [{fields, [title, url]}]}, {'Elixir.Crawly.Pipelines.DuplicatesFilter', [{item_id, title}]}, {'Elixir.Crawly.Pipelines.JSONEncoder'}, {'Elixir.Crawly.Pipelines.WriteToFile', [{folder, <<"/tmp">>}, {extension, <<"jl">>}]} ] }] }].Now lets start the Crawly (First pull it from DockerHub:
docker pull oltarasenko/crawly:0.15.0):docker run --name crawly -e "SPIDERS_DIR=/app/spiders" \ -it -p 4001:4001 -v $(pwd)/spiders:/app/spiders \ -v $(pwd)/crawly.config:/app/config/crawly.config \ crawlyYou can either fetch the latest version of Crawly from DockerHub or built it yourself (
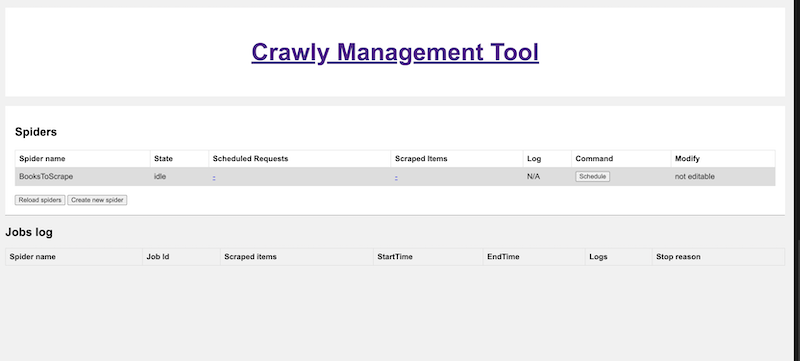
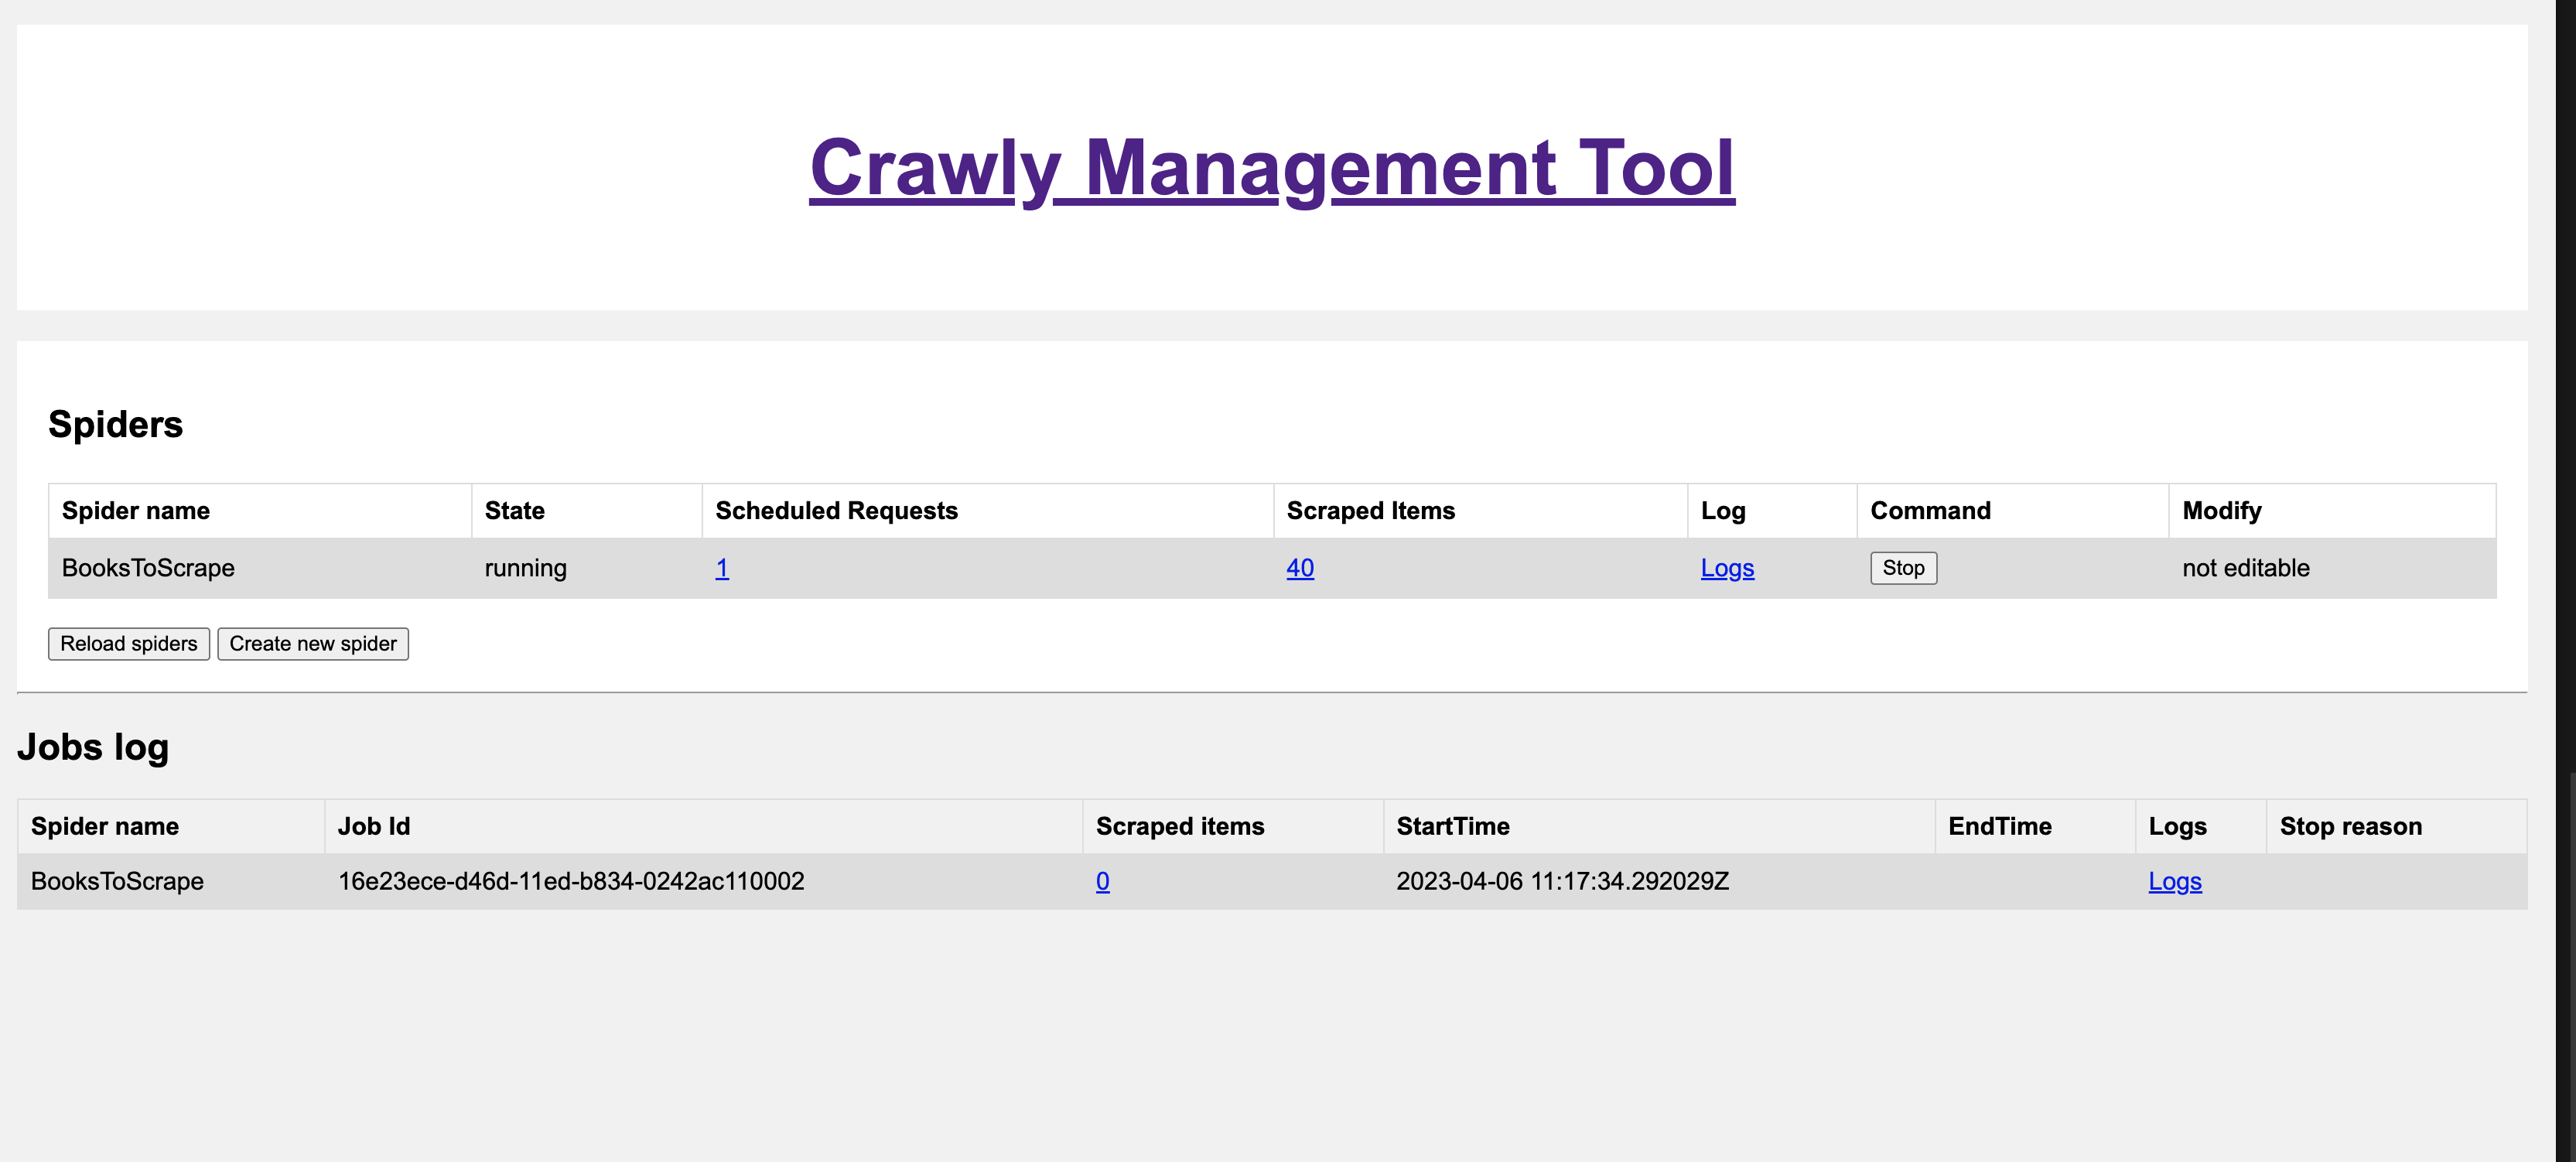
docker build -t crawly .) ** SPIDERS_DIR environment variable specifies a folder from which additional spiders are going to be fetched../spidersis used by defaultOpen Crawly Web Management interface in your browser: https://localhost:4001/ Here it's possible to Schedule a spider with a use of Schedule button. The interface also allows you to access other useful information like:
History of your jobs
Items
Logs of the given spider