How to call functions from a running Phoenix app
Copy MarkdownWhen using Livebook for internal tools, runbooks, or engineering support, a common need is to call code from a running Phoenix app.
This guide shows how to connect your notebook to your Phoenix app and execute remote function calls, both in development and production environments.
Connect to your local Phoenix app
First, start your Phoenix app with a named node and cookie:
$ iex --name my_app@127.0.0.1 --cookie secret -S mix phx.server
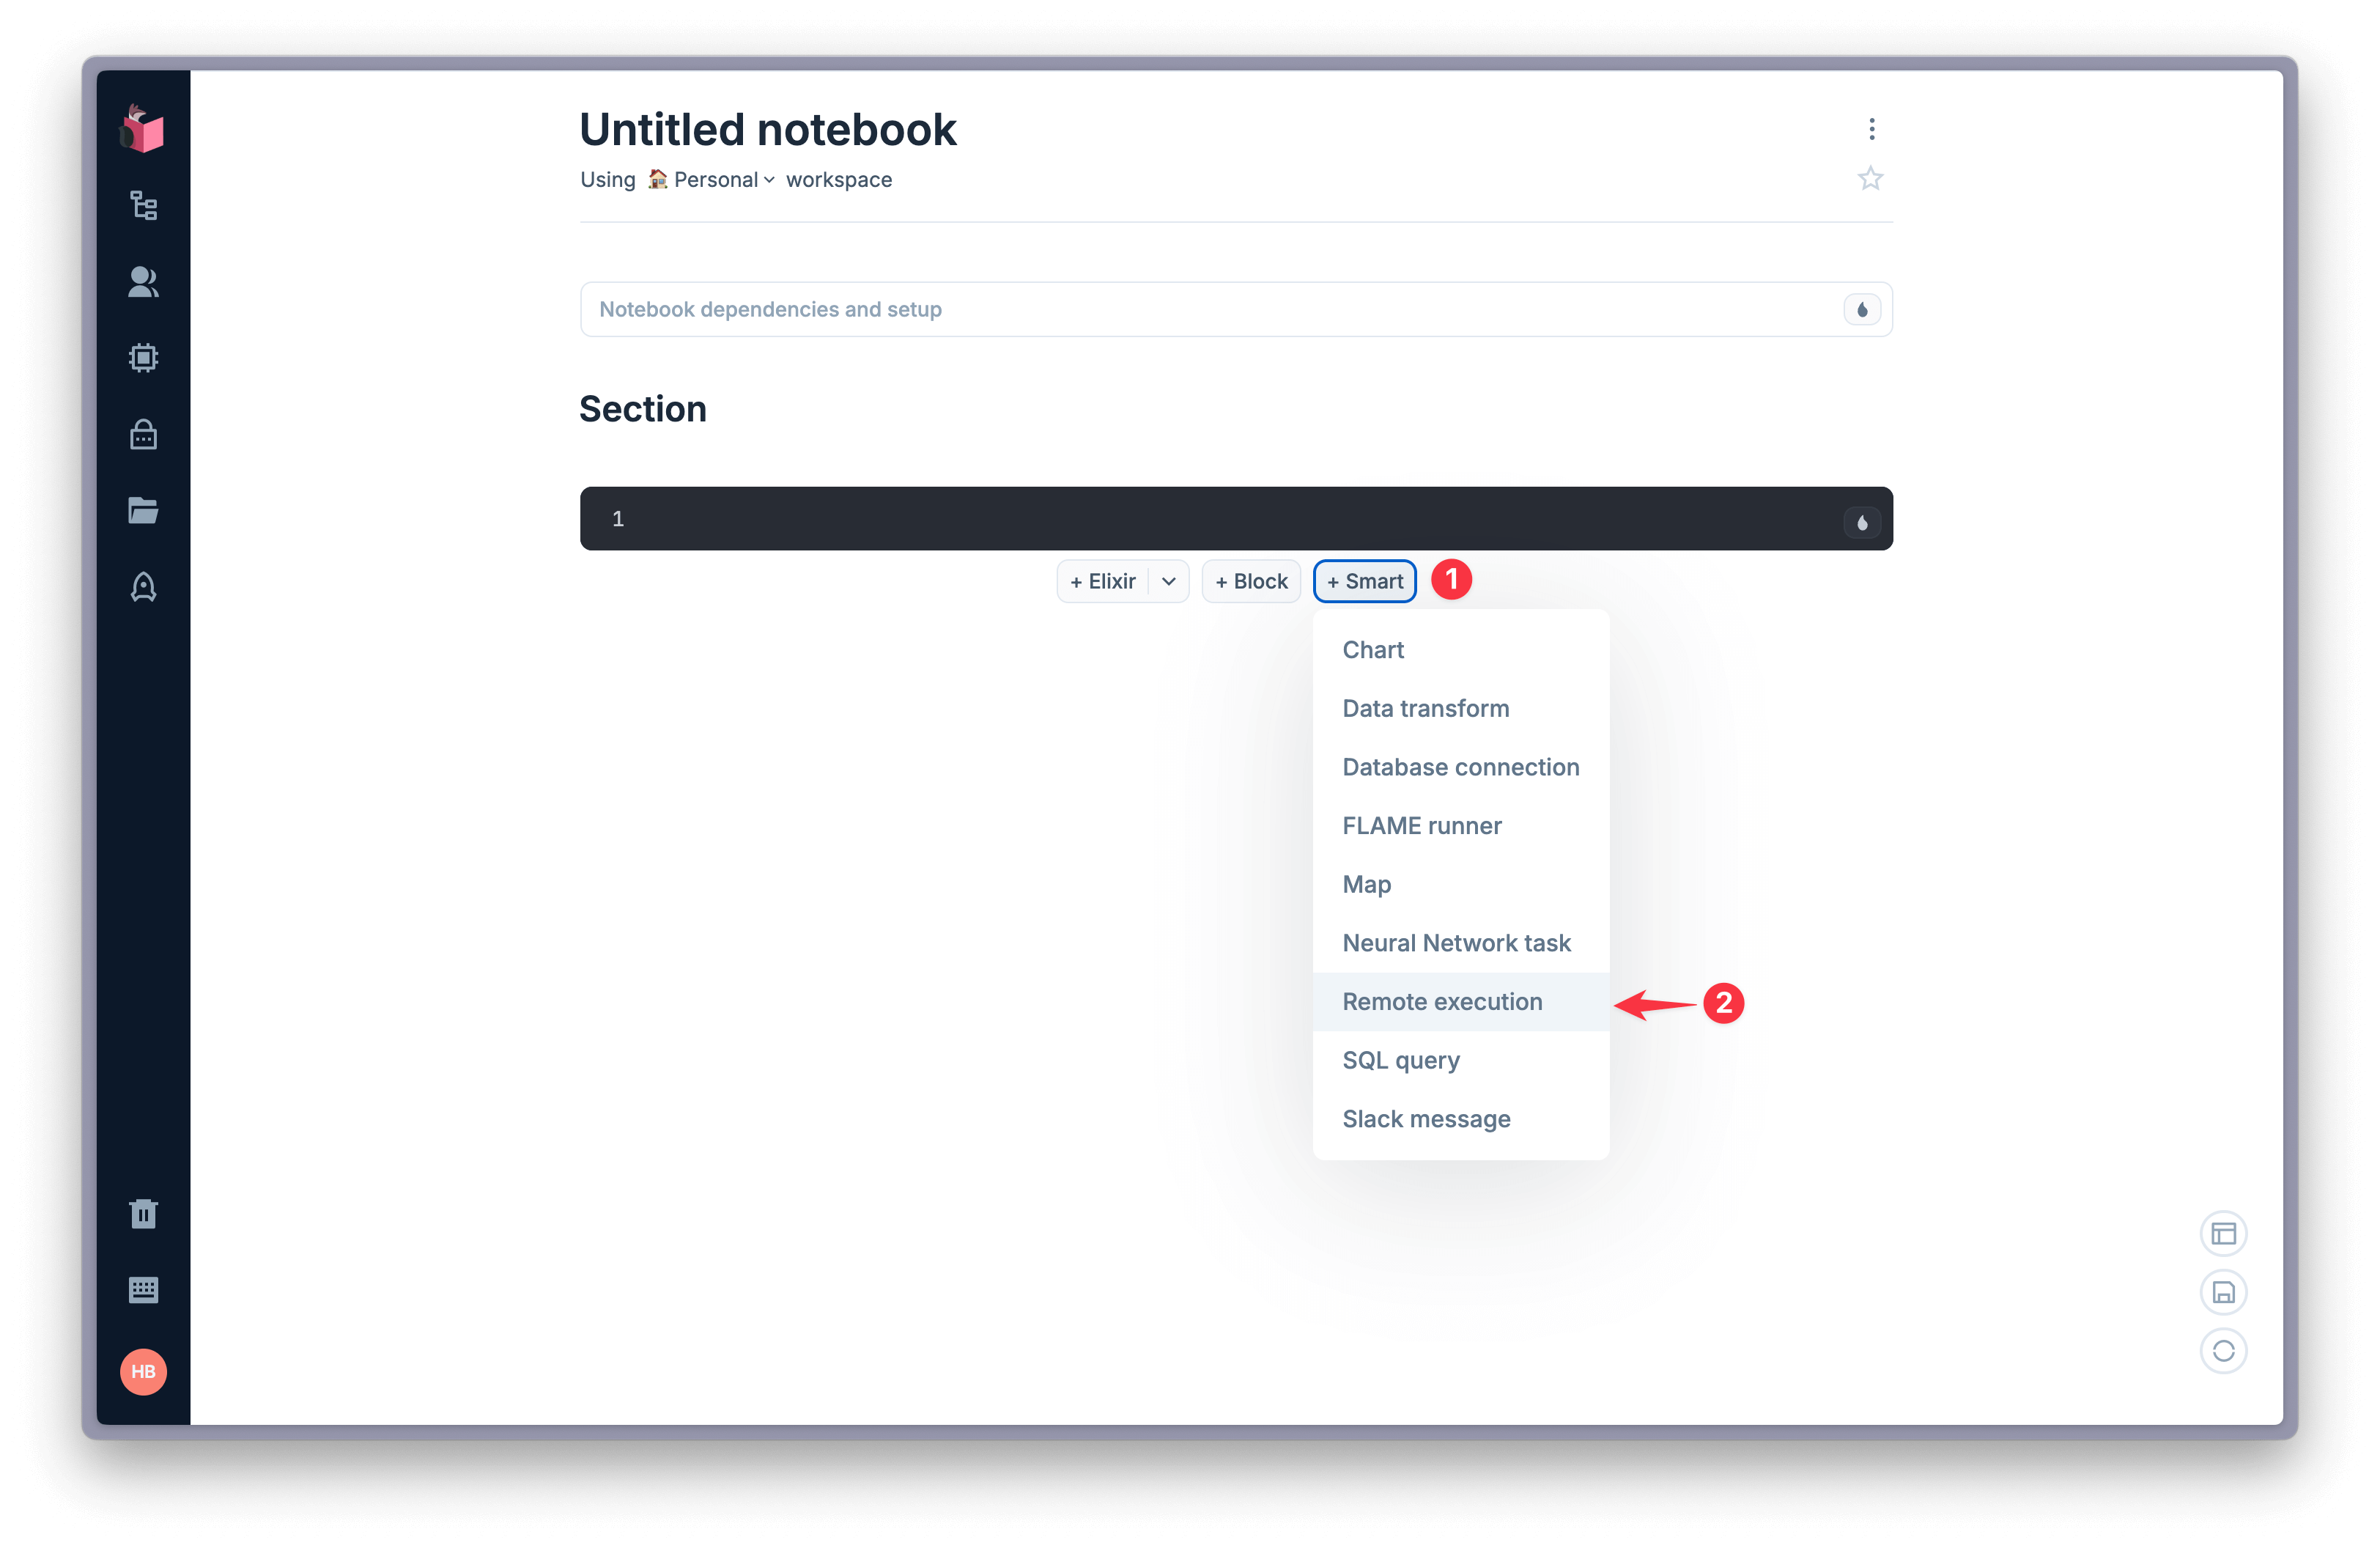
Now, create a new notebook, and add a remote execution smart cell:
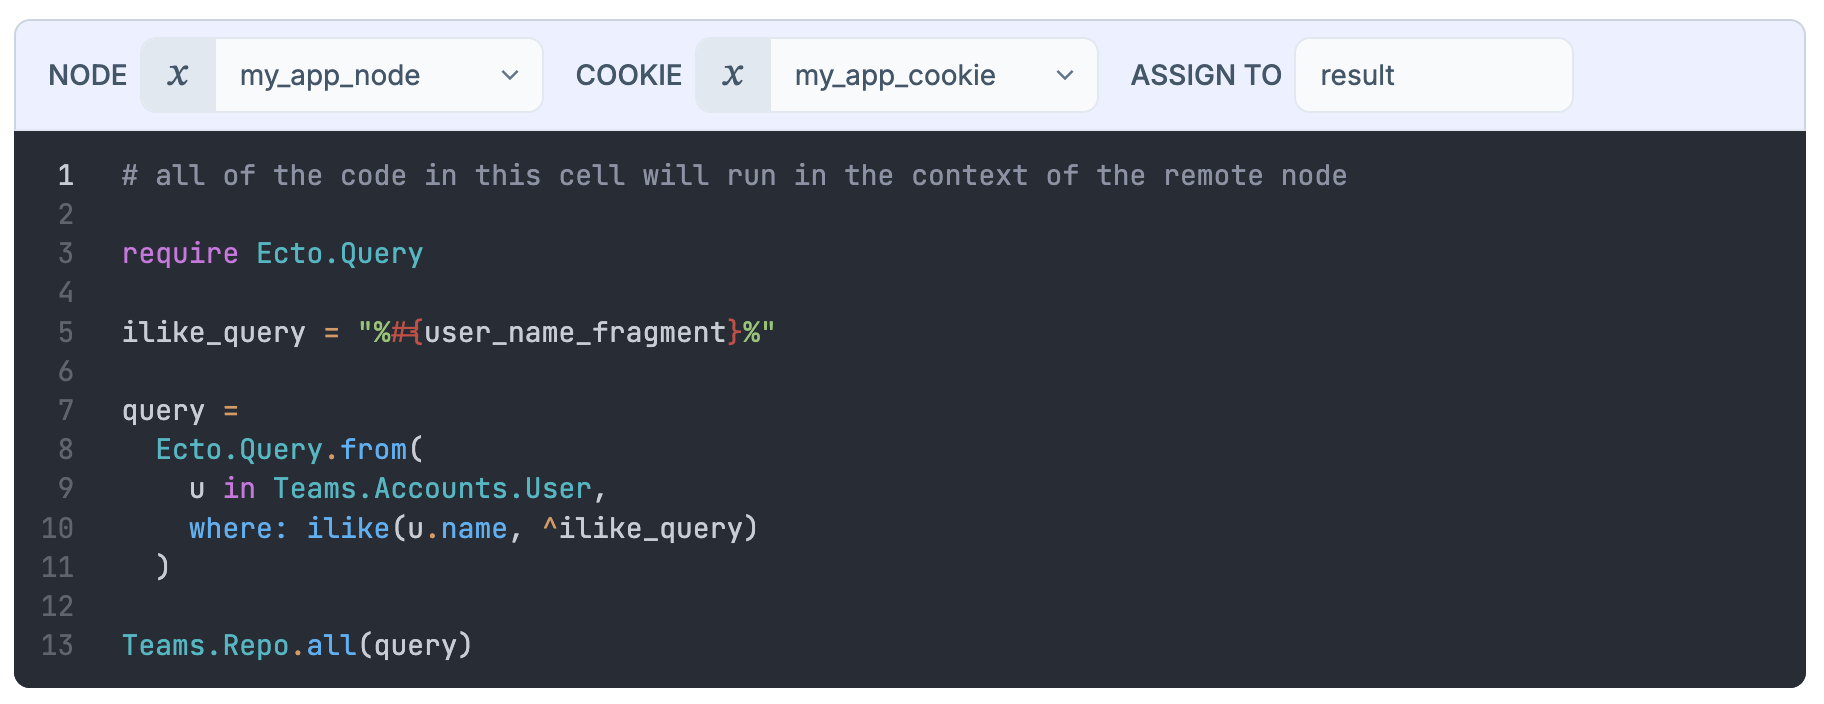
Set the node and cookie configs to the values you set when starting your Phoenix app:
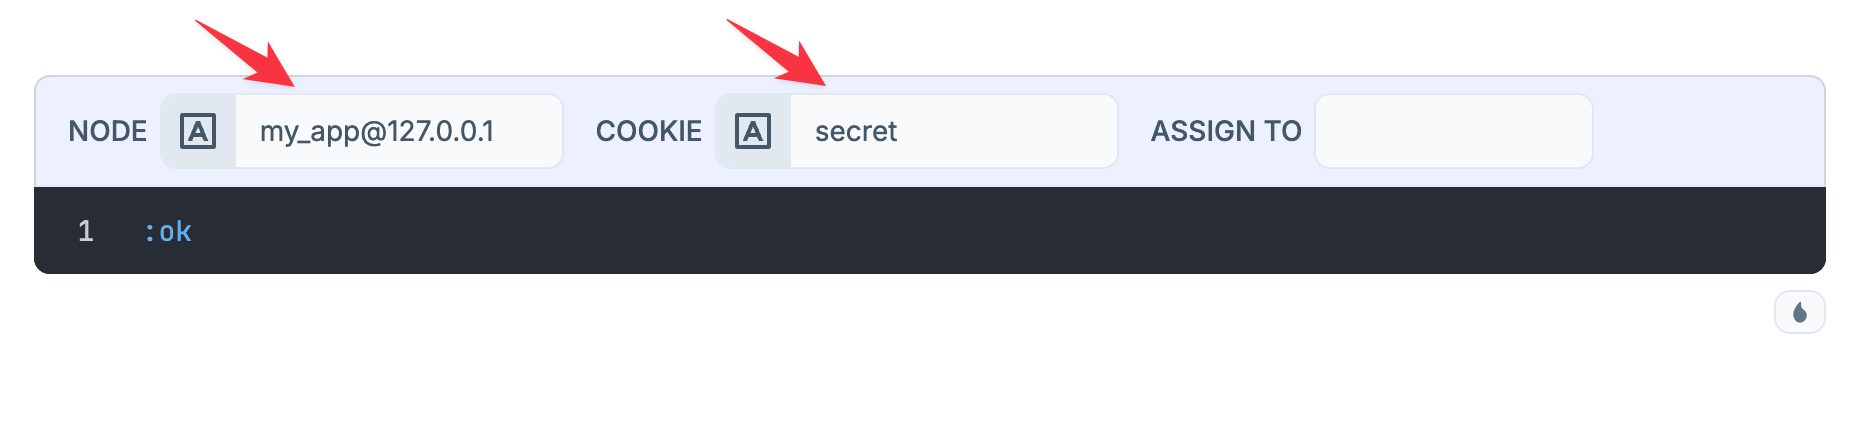
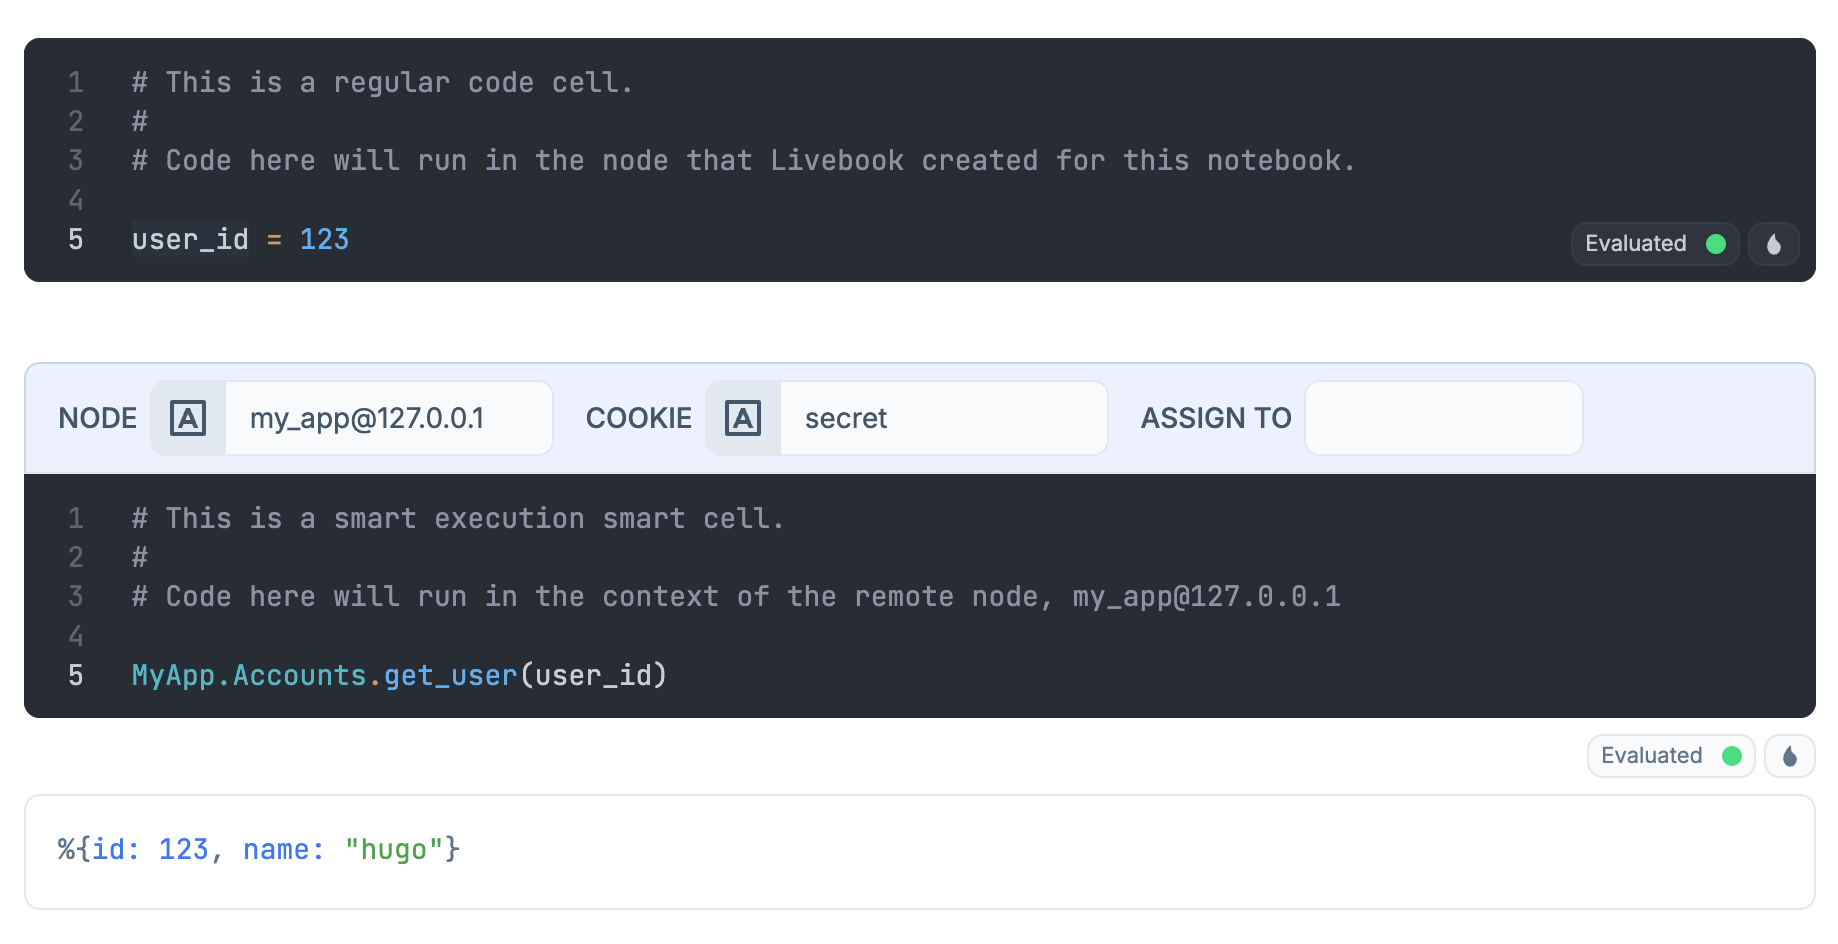
Now you can write code inside that smart cell, and it will be evaluated in the context of your Phoenix app's node:
Understanding how Livebook leverages distributed Erlang
By default, Livebook starts a new Erlang VM node for each notebook. This is the standalone runtime.
Under the hood, the remote execution smart cell leverages distributed Erlang to call functions from your Phoenix app.
It clusters your notebook's node with your Phoenix app's node, and evaluates the code inside the smart cell in the context of your Phoenix app's node.
graph LR
    subgraph livebook_node["Erlang VM node"]
        A[Livebook]
    end

   subgraph standalone_node["Erlang VM node per notebook"]
        B[code inside the notebook]
    end

   subgraph app_node["Erlang VM node running your Phoenix app"]
        C[Phoenix app]
    end

   A -.-|starts and clusters with| standalone_node
   standalone_node -.-|clusters with| app_node
Connect to your Phoenix app in production
When developing and deploying a Livebook app that integrates with a Phoenix app, you need a way to handle the connection between them during both development and production.
To support both environments, use Livebook secrets to make the connection between your notebook and your Phoenix app configurable.
Set up environment secrets
Create these secrets in your Livebook Teams workspace:
For development:
PHOENIX_APP_ENV: Set todevPHOENIX_APP_COOKIE: Set to your local cookie value (e.g.,secret)
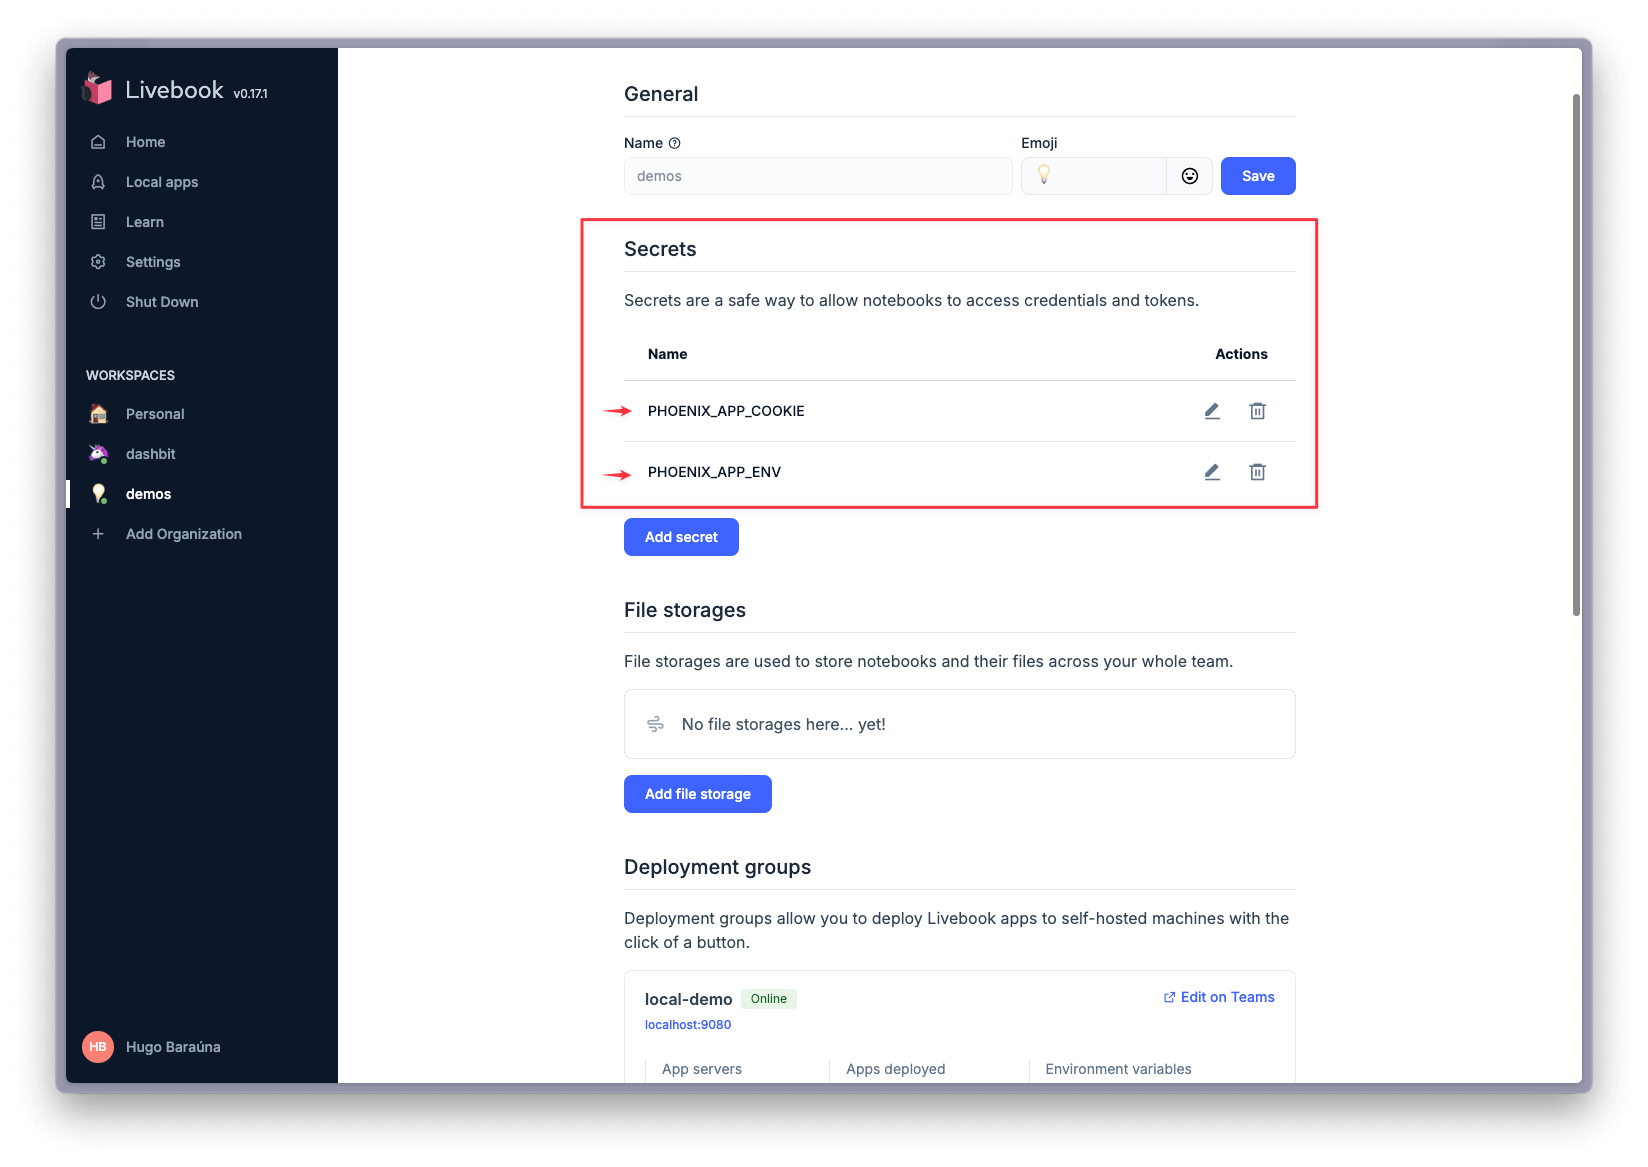
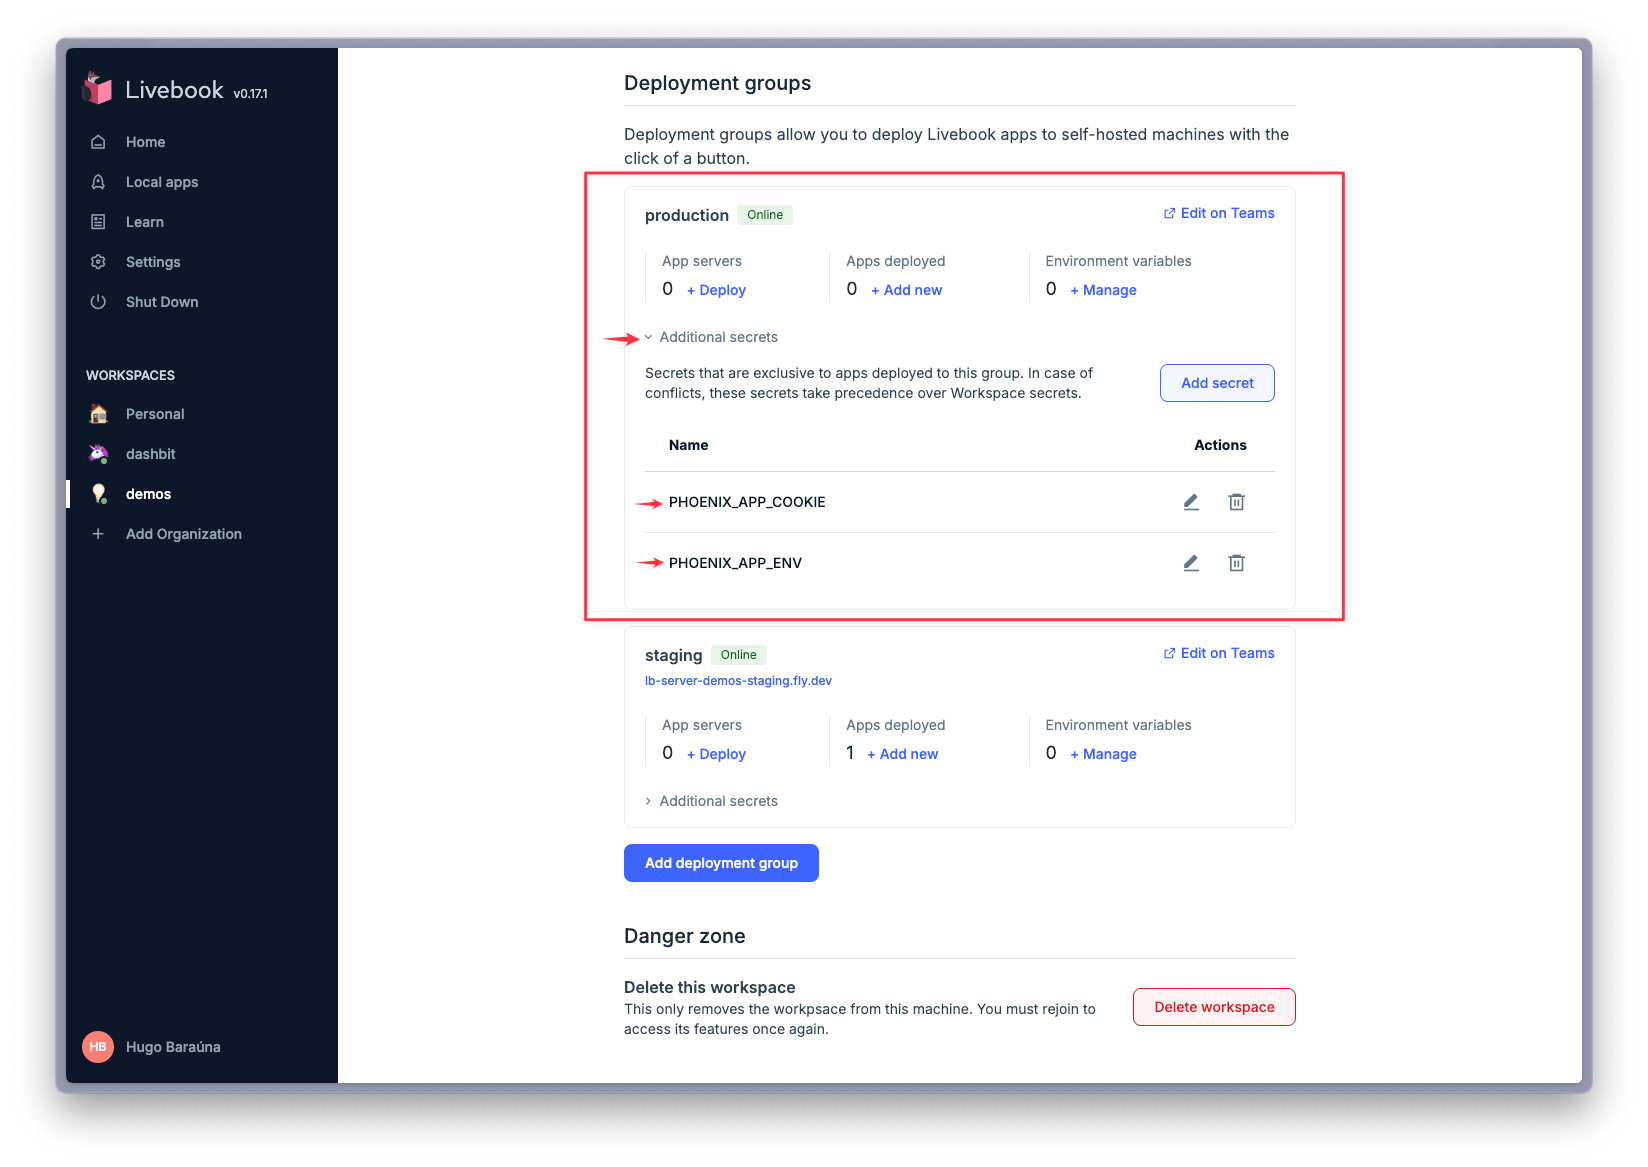
For production: Use additional secrets in your Teams workspace deployment group to override these values:
PHOENIX_APP_ENV: Set toproductionPHOENIX_APP_COOKIE: Set to your production cookie value
Create a connection module
Add this module to your notebook to handle environment-specific connections:
defmodule NodeConnection do
def connect() do
node = target_node()
Node.set_cookie(node, cookie())
case Node.connect(node) do
true -> :ok
_ -> {:error, "Failed to connect to #{inspect(node)}"}
end
end
def cookie() do
String.to_atom(System.fetch_env!("LB_PHOENIX_APP_COOKIE"))
end
def target_node() do
case System.fetch_env!("LB_PHOENIX_APP_ENV") do
"dev" ->
:"my_app@127.0.0.1"
env when env in ["staging", "production"] ->
discover_node()
end
end
defp discover_node() do
# Implementation depends on your deployment platform
# See platform-specific examples below
end
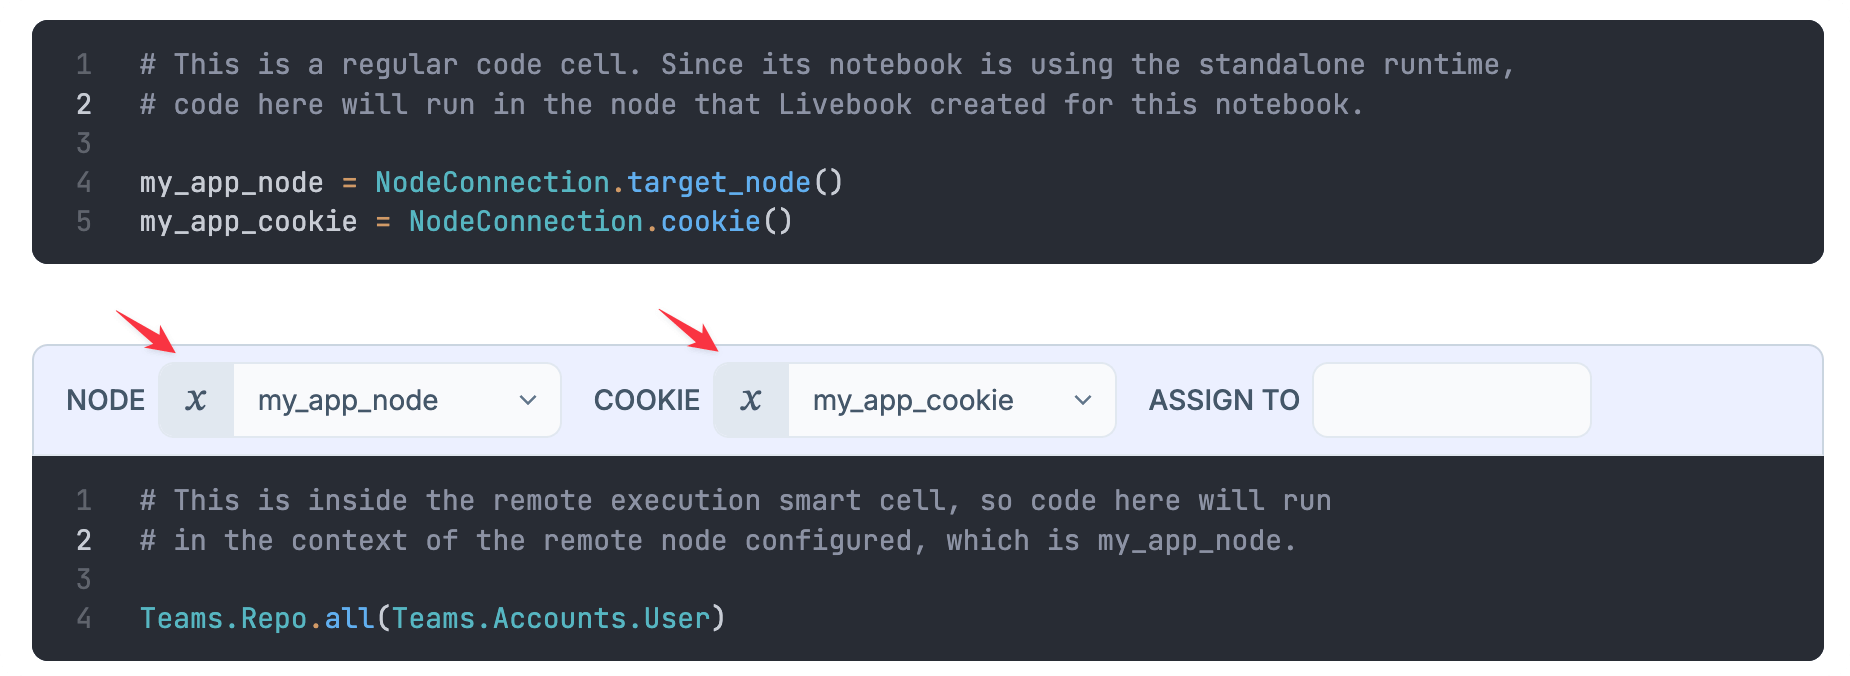
endUsing the new NodeConnection module, get the node and cookie values and assign them to variables to be used as configurations in the remote execution smart cell:
my_app_node = NodeConnection.target_node()
my_app_cookie = NodeConnection.cookie()
Now you're ready to use the remote execution smart cell, with the node and cookie being set dynamically:

Discovery of node names in production
In a production environment, you need to programmatically discover your app's node name.
The approach depends on your deployment platform and node naming strategy. Here's an example:
Example: Fly.io node discovery
When deploying to Fly.io, your Phoenix app node is typically named using the RELEASE_NODE environment variable like this:
# rel/env.sh.eex

export RELEASE_NODE="${FLY_APP_NAME}-${FLY_IMAGE_REF##*-}@${FLY_PRIVATE_IP}"
Let's build a solution that uses Fly's API to discover that node name.
- Create these additional secrets inside your Teams workspace:
FLY_TOKEN: Your Fly.io API tokenFLY_APP: Your Fly app name
- Add this Fly.io discovery module to your notebook:
# Add {:req, "~> 0.5"} to your notebook dependencies

defmodule Fly do
  def discover_node() do
    {:ok, [fly_machine | _]} = machines(fly_app_name())
    ip = fly_machine["private_ip"]
    :"#{fly_app_name()}-#{extract_image_id(fly_machine)}@#{ip}"
  end

  defp machines(fly_app_name) do
    case Req.get(new(), url: "/v1/apps/#{fly_app_name}/machines") do
      {:ok, %Req.Response{status: 200} = response} ->
        {:ok, response.body}
      {:error, reason} ->
        {:error, "Failed to fetch Fly machines: #{inspect(reason)}"}
    end
  end

  defp new() do
    Req.new(
      base_url: "https://api.machines.dev",
      auth: {:bearer, System.fetch_env!("LB_FLY_TOKEN")}
    )
  end

  defp extract_image_id(fly_machine) do
    image_tag = fly_machine["image_ref"]["tag"]
    [image_id] = Regex.run(~r/.*-(.*)/, image_tag, capture: :all_but_first)
    image_id
  end

  defp fly_app_name, do: System.fetch_env!("LB_FLY_APP")
end- Update your
NodeConnectionmodule to use Fly discovery:
defmodule NodeConnection do
  # ... previous code ...

  defp discover_node() do
    Fly.discover_node()  # Use Fly.io node discovery
  end
end
Configure your Phoenix app for clustering
Your Phoenix app needs specific configuration to support clustering.
Set a static cookie
Set the RELEASE_COOKIE environment variable on your production machines to ensure a static cookie value across deployments, then restart or redeploy your app.
Use the same value for your PHOENIX_APP_COOKIE Livebook secret.
Learn more about setting the cookie of an Elixir release here.
Enable long node names
Livebook requires long node names. Configure the RELEASE_DISTRIBUTION environment variable inside your app's rel/env.sh.eex like this:
# rel/env.sh.eex

export RELEASE_DISTRIBUTION=name
Conveniences for working with remote code
Livebook provides built-in tools to simplify working with remote code.
Remote execution smart cell
The remote execution smart cell offers several advantages over manual :erpc.call functions:
Built-in connection management
Set the node name and cookie directly in the smart cell.
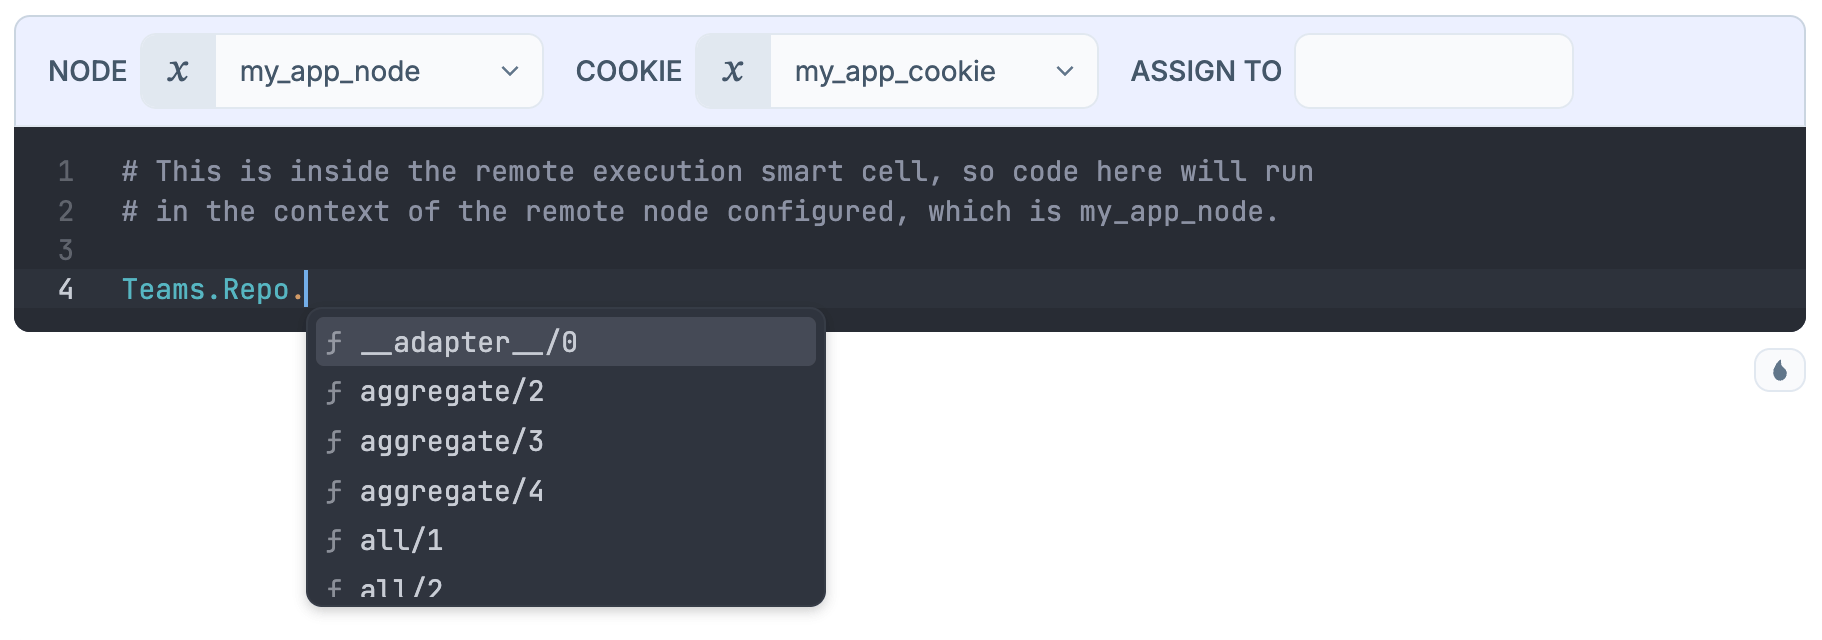
Code autocomplete
Get autocomplete for functions from your remote Phoenix app.
Multi-line execution
Run multiple lines of code in the remote context.
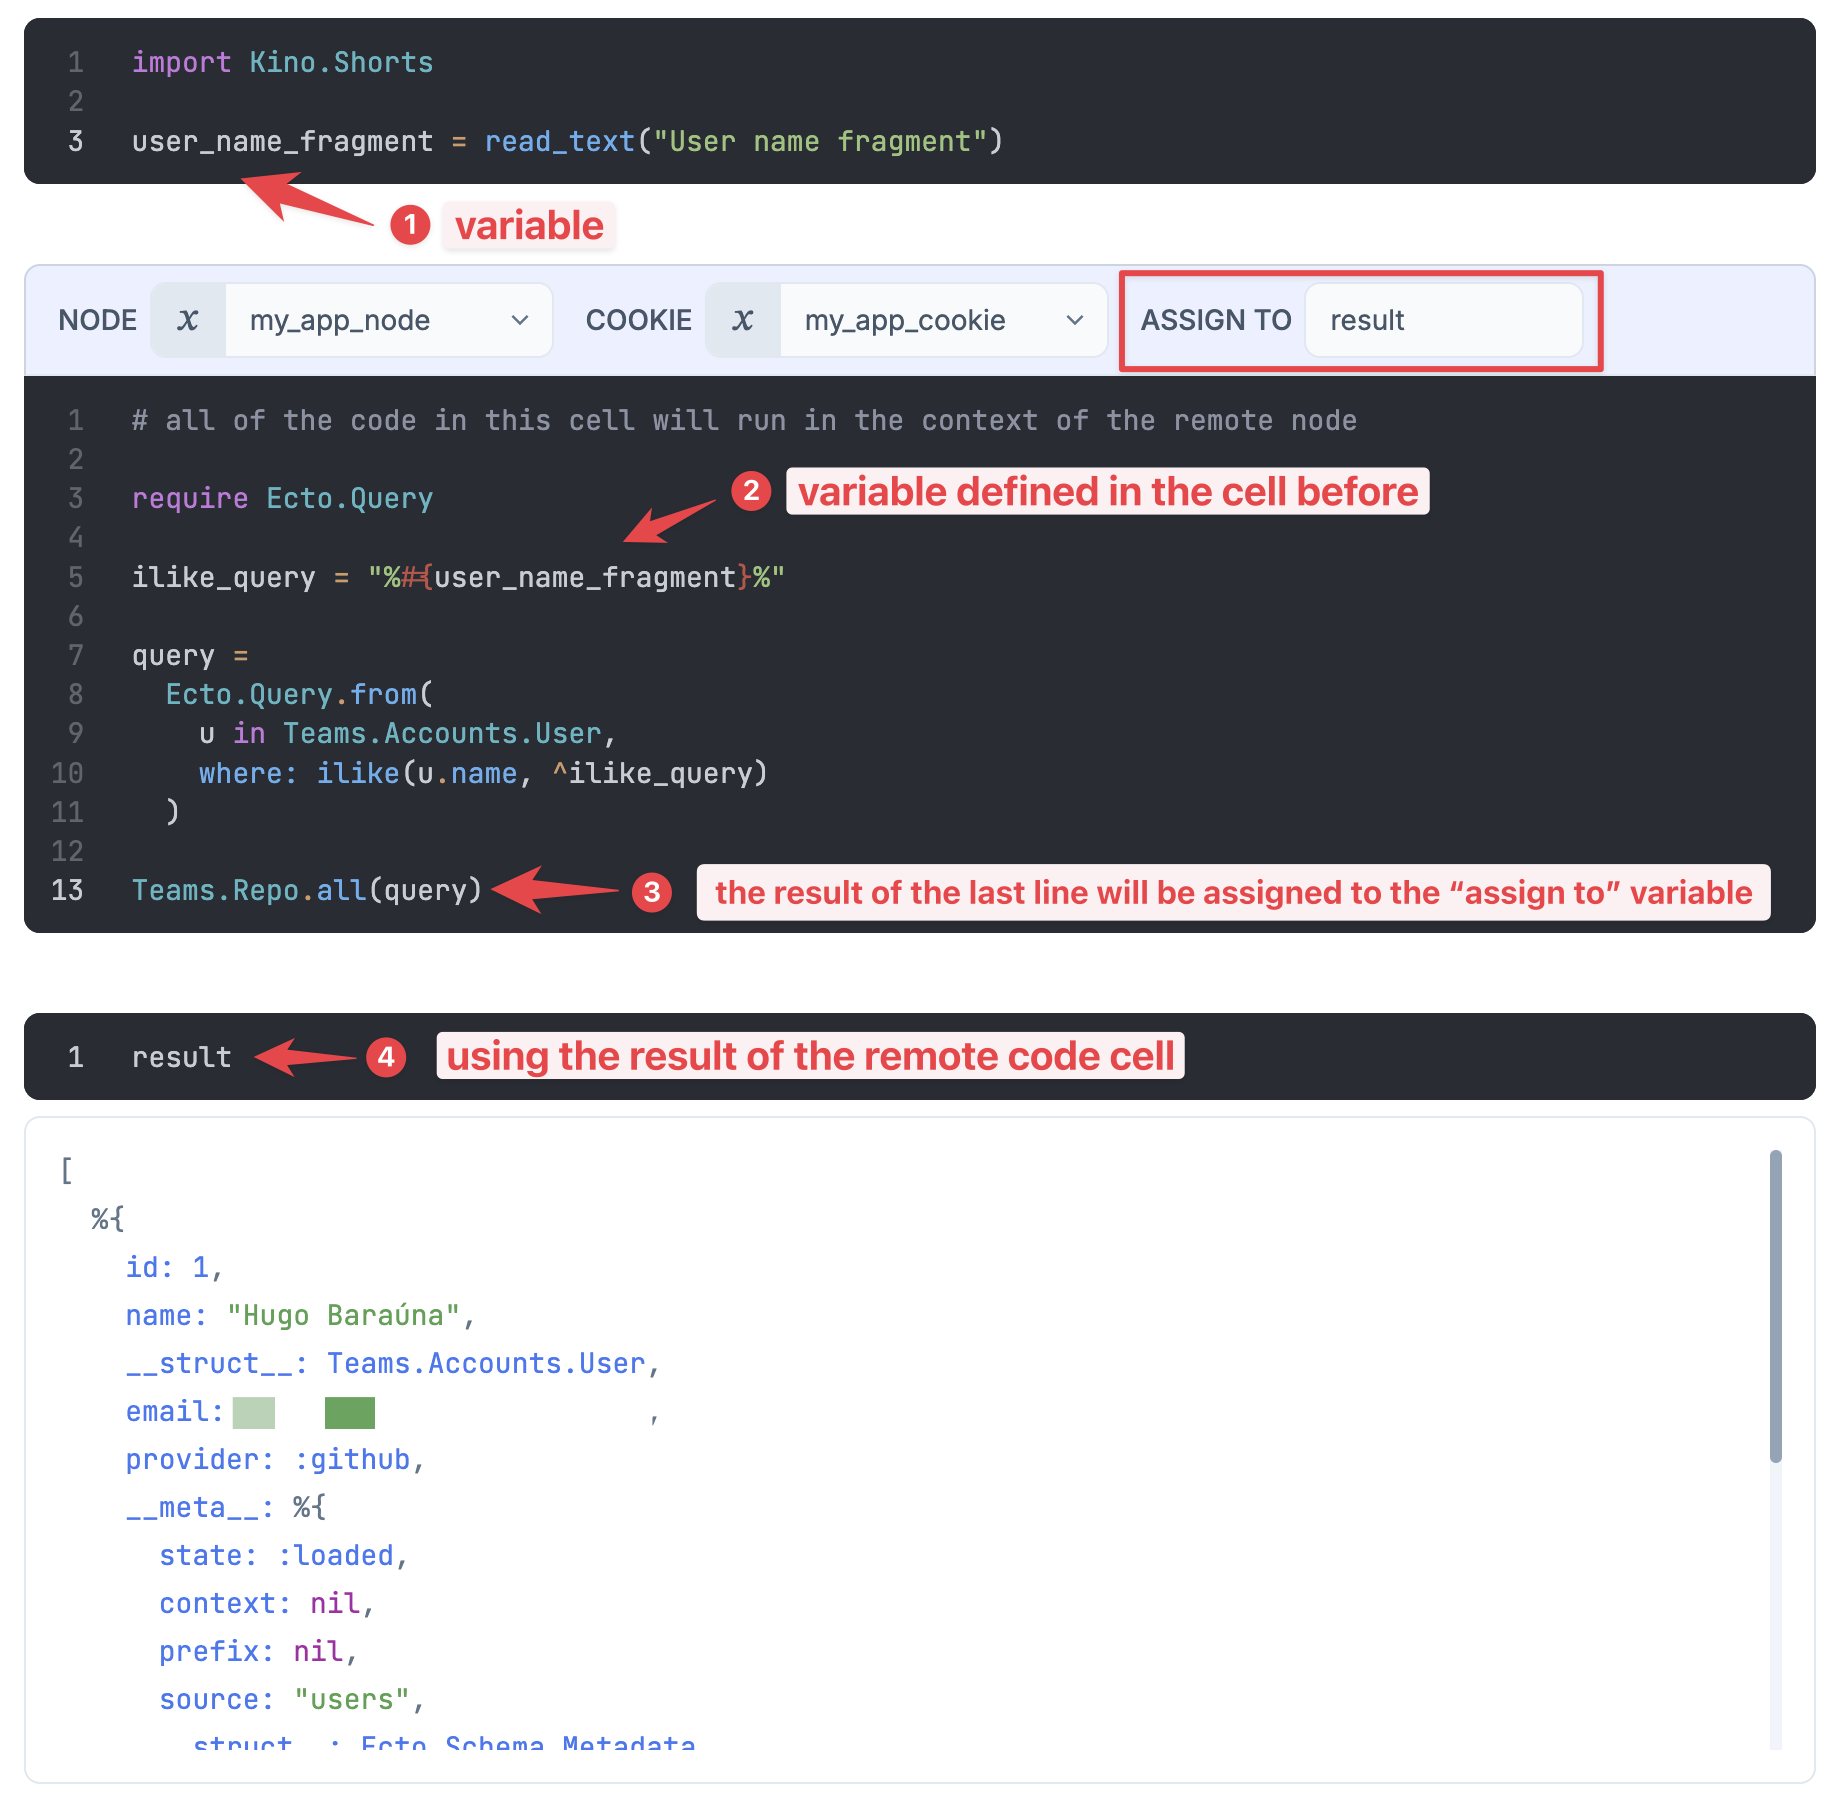
Variable integration
Reference notebook variables and assign results back to the notebook.
Kino.RPC
For more flexibility, use Kino.RPC directly. This is the same module the remote execution smart cell uses behind the scenes.
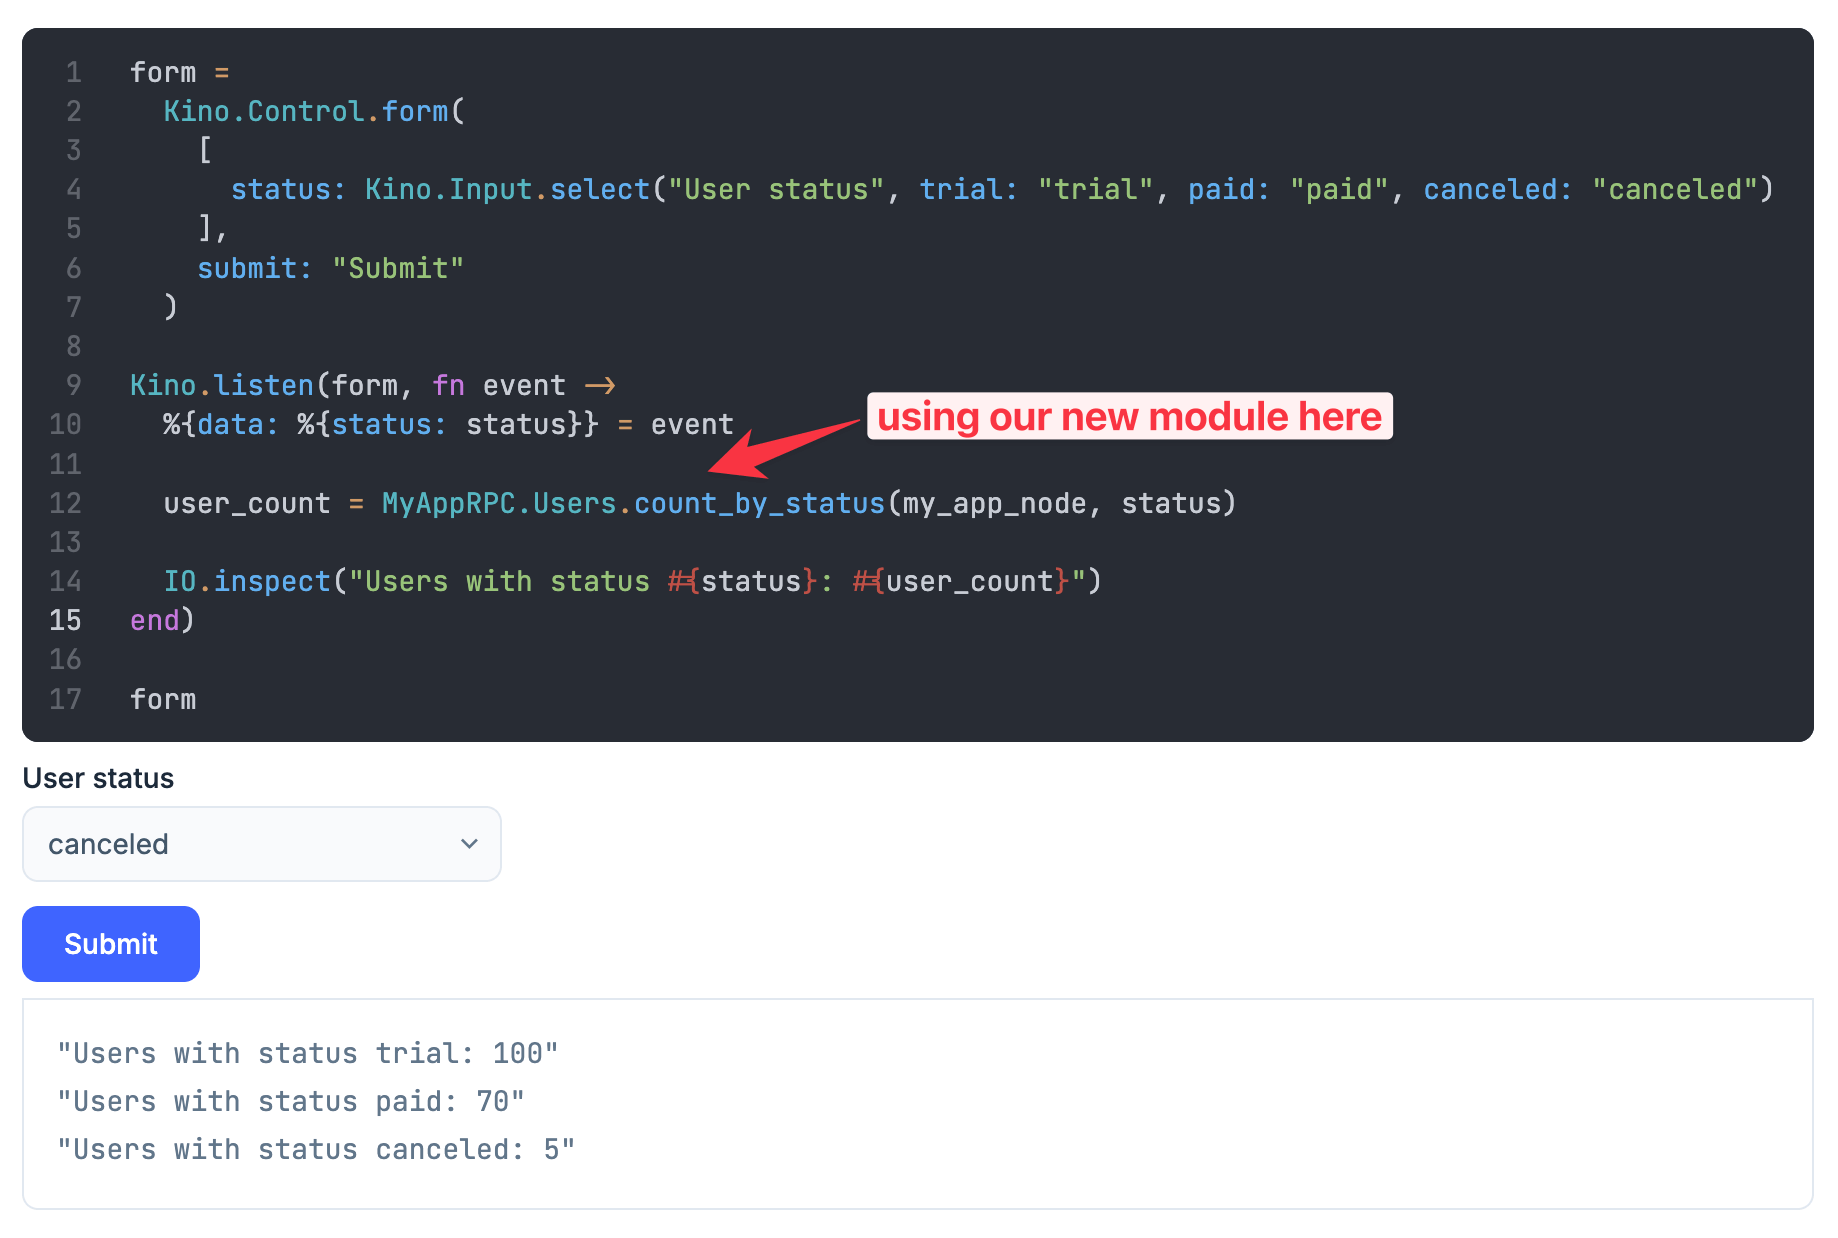
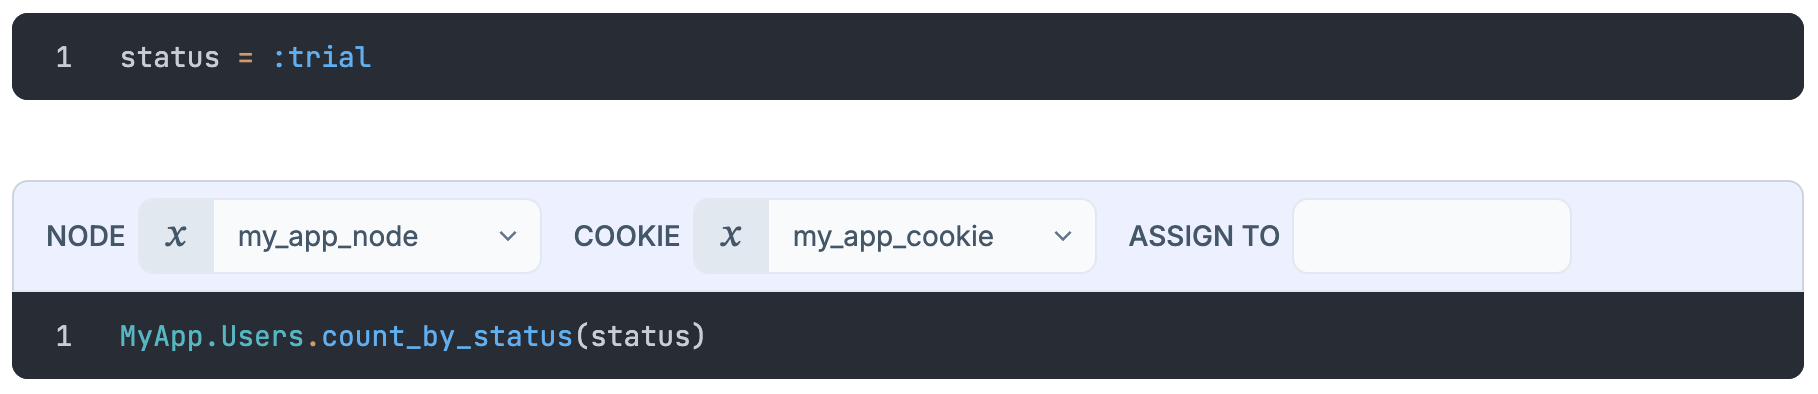
Let's say you're building a Livebook app to show user counts by status. Given your Phoenix app has a function MyApp.Users.count_by_status/1, you can call it using the remote execution smart cell:
But what if you want the status variable to come from a form input?
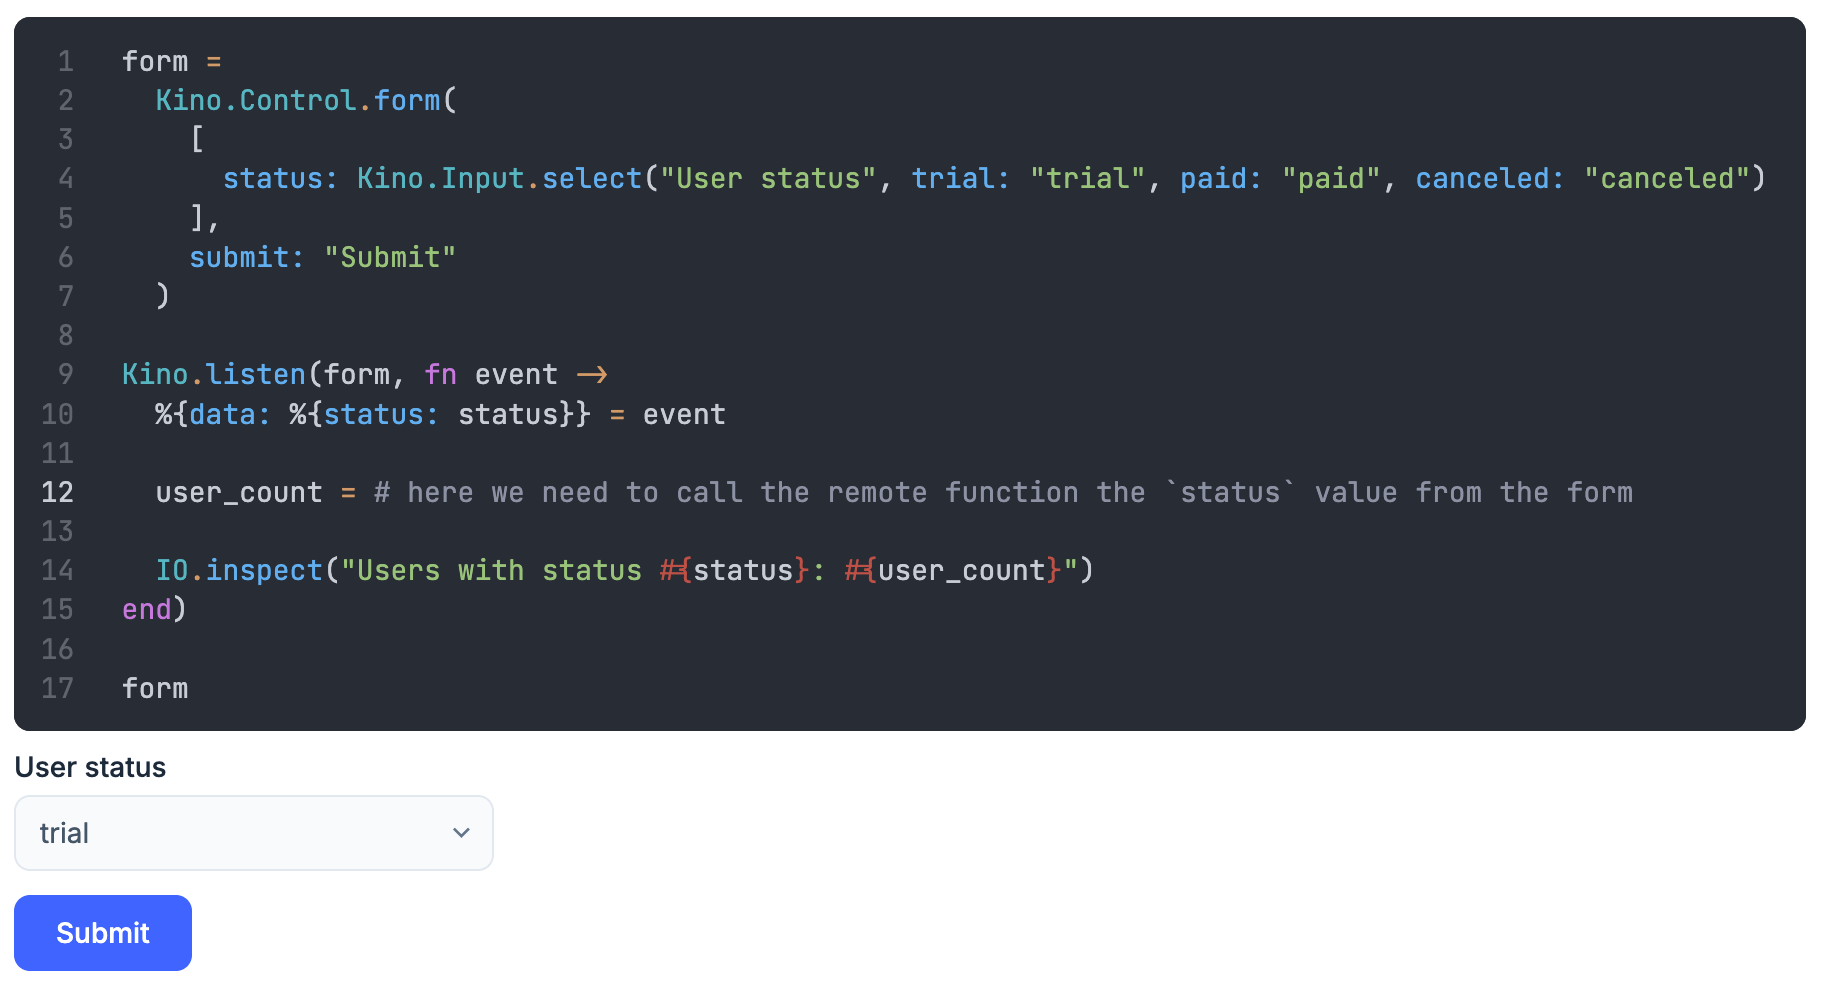
Now we need a way to call the remote function passing an argument that's coming from the form. To do that, we can extract the remote function call into a reusable module.
First, convert your remote execution smart cell to a regular code cell by clicking on the pencil icon:
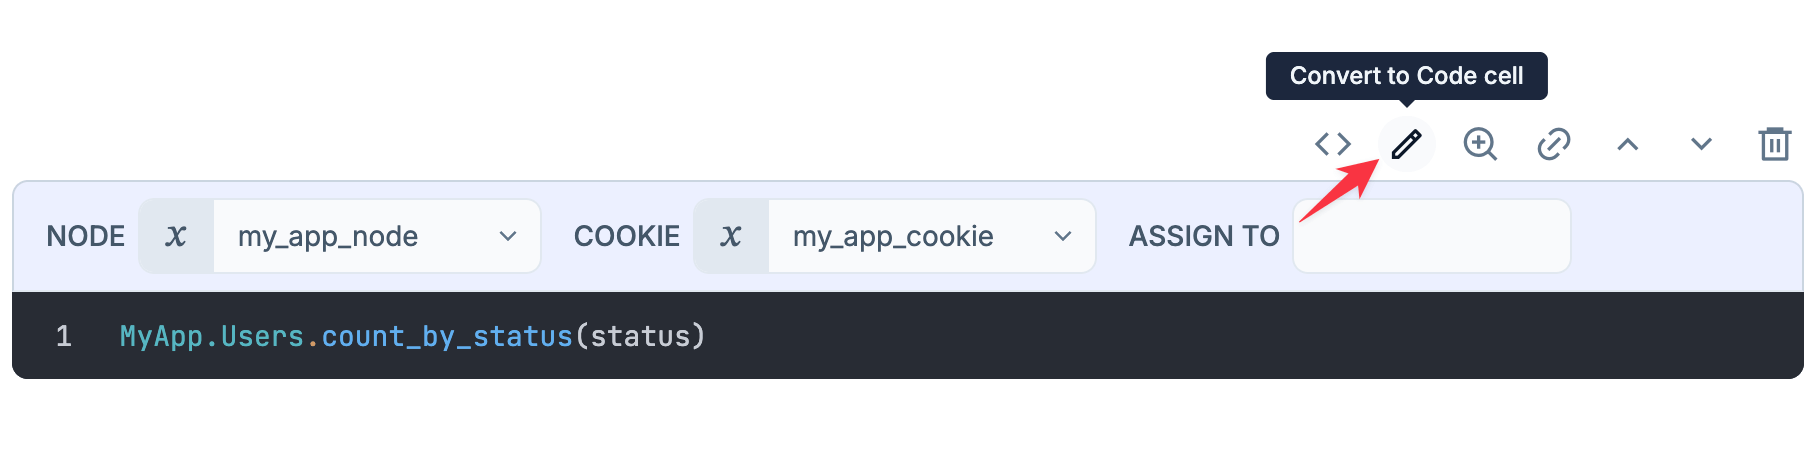
You'll see that the smart cell was generating this code:
require Kino.RPC
node = my_app_node
Node.set_cookie(node, my_app_cookie)
Kino.RPC.eval_string(node, ~S"MyApp.Users.count_by_status(status)", file: __ENV__.file)
Extract this into a module so you can pass the status value as an argument:
Node.set_cookie(my_app_node, my_app_cookie)

defmodule MyAppRPC.Users do
  require Kino.RPC

  def count_by_status(node, status) do
    Kino.RPC.eval_string(node, ~S"MyApp.Users.count_by_status(status)", file: __ENV__.file)
  end
end
Now you can use this module with your form: