Up and Running
The aim of this first guide is to get a Phoenix application up and running as quickly as possible.
Before we begin, please take a minute to read the Installation Guide. By installing any necessary dependencies beforehand, we’ll be able to get our application up and running smoothly.
At this point, we should have Elixir, Erlang, Hex, and the Phoenix archive installed. We should also have PostgreSQL and node.js installed to build a default application.
Ok, we’re ready to go!
We can run mix phx.new from any directory in order to bootstrap our Phoenix application. Phoenix will accept either an absolute or relative path for the directory of our new project. Assuming that the name of our application is hello, let’s run the following command:
$ mix phx.new helloA note about Brunch.io before we begin: Phoenix will use Brunch.io for asset management by default. Brunch.io’s dependencies are installed via the node package manager, not mix. Phoenix will prompt us to install them at the end of the
mix phx.newtask. If we say “no” at that point, and if we don’t install those dependencies later withnpm install, our application will raise errors when we try to start it, and our assets may not load properly. If we don’t want to use Brunch.io at all, we can simply pass--no-brunchtomix phx.new.
A note about Ecto: Ecto allows our Phoenix application to communicate with a data store, such as PostgreSQL or MongoDB. If our application will not require this component we can skip this dependency by passing the
--no-ectoflag to themix phx.new. This flag may also be combined with--no-brunchto create a skeleton application.
mix phx.new hello
* creating hello/config/config.exs
* creating hello/config/dev.exs
* creating hello/config/prod.exs
...
* creating hello/lib/hello_web/views/layout_view.ex
* creating hello/lib/hello_web/views/page_view.ex

Fetch and install dependencies? [Yn]
Phoenix generates the directory structure and all the files we will need for our application. When it’s done, it will ask us if we want it to install our dependencies for us. Let’s say yes to that.
Fetch and install dependencies? [Yn] Y
* running mix deps.get
* running mix deps.compile
* running cd assets && npm install && node node_modules/brunch/bin/brunch build

We are all set! Go into your application by running:

    $ cd hello

Then configure your database in config/dev.exs and run:

    $ mix ecto.create

Start your Phoenix app with:

    $ mix phx.server

You can also run your app inside IEx (Interactive Elixir) as:

    $ iex -S mix phx.server
Once our dependencies are installed, the task will prompt us to change into our project directory and start our application.
Phoenix assumes that our PostgreSQL database will have a postgres user account with the correct permissions and a password of “postgres”. If that isn’t the case, please see the instructions for the ecto.create mix task.
Ok, let’s give it a try. First, we’ll cd into the hello/ directory we’ve just created:
$ cd helloNow we’ll create our database:
$ mix ecto.create
The database for Hello.Repo has been created
Note: if this is the first time you are running this command, Phoenix may also ask to install Rebar. Go ahead with the installation as Rebar is used to build Erlang packages.
And finally, we’ll start the Phoenix server:
$ mix phx.server
[info] Running HelloWeb.Endpoint with Cowboy using http://0.0.0.0:4000
19:30:43 - info: compiled 6 files into 2 files, copied 3 in 2.1 sec
If we choose not to have Phoenix install our dependencies when we generate a new application, the phx.new task will prompt us to take the necessary steps when we do want to install them.
Fetch and install dependencies? [Yn] n

We are almost there! The following steps are missing:

    $ cd hello
    $ mix deps.get
    $ cd assets && npm install && node node_modules/brunch/bin/brunch build

Then configure your database in config/dev.exs and run:

    $ mix ecto.create

Start your Phoenix app with:

    $ mix phx.server

You can also run your app inside IEx (Interactive Elixir) as:

    $ iex -S mix phx.server
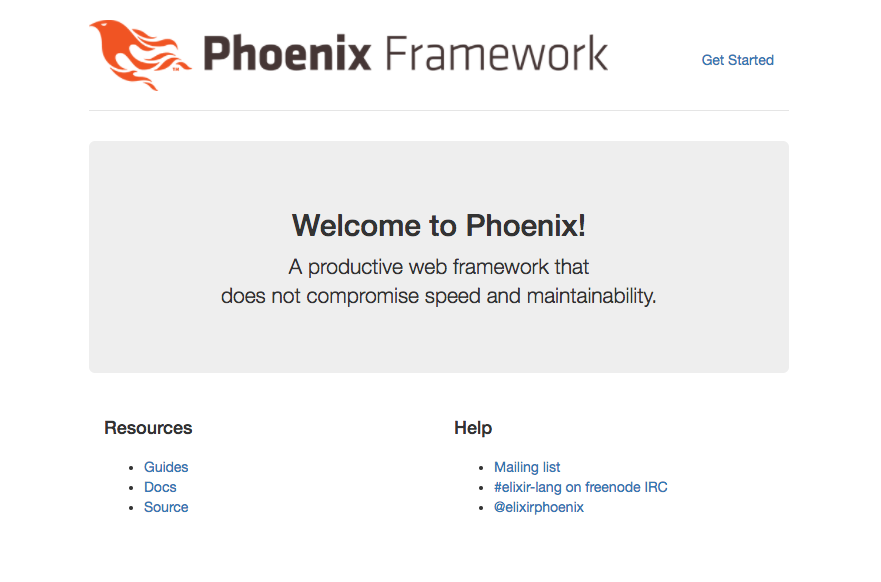
By default Phoenix accepts requests on port 4000. If we point our favorite web browser at http://localhost:4000, we should see the Phoenix Framework welcome page.

If your screen looks like the image above, congratulations! You now have a working Phoenix application. In case you can’t see the page above, try accessing it via http://127.0.0.1:4000 and later make sure your OS has defined “localhost” as “127.0.0.1”.
Locally, our application is running in an iex session. To stop it, we hit ctrl-c twice, just as we would to stop iex normally.
The next step is customizing our application just a bit to give us a sense of how a Phoenix app is put together.
