Your First Native LiveView
Now that you've installed LiveView Native, its time to create a LiveView that uses it. This guide explains how to create a basic LiveView module that can serve different templates to both web and native platforms while sharing non-template code between them.
A basic LiveView
Info
For more information on LiveView in general, see the docs for
Phoenix.LiveViewhere.
To begin, create a new LiveView module and add it to your Phoenix router. The path for this LiveView
should be identical to the path you chose when setting up your native client app (this defaults to "/",
when using mix lvn.install to install LiveView Native).
First create a new LiveView somewhere in your app that inherits LiveViewNative.LiveView, like so:
# lib/my_app_web/live/hello_live.ex
defmodule MyAppWeb.HelloLive do
  use Phoenix.LiveView
  use MyAppWeb, :live_view

  @impl true
  def render(%{} = assigns) do
    # This UI renders on the web
    ~H"""
    <div class="flex w-full h-screen items-center">
      <span class="w-full text-center">
        Hello web!
      </span>
    </div>
    """
  end
end
Then, add it to your app's router:
# lib/my_app_web/router.ex
defmodule MyAppWeb.Router do
use MyAppWeb, :router
### Pipelines, etc.
scope "/", MyAppWeb do
pipe_through :browser
### Other routes...
live "/", HelloLive
end
### Routes for LiveDashboard, Swoosh, etc.
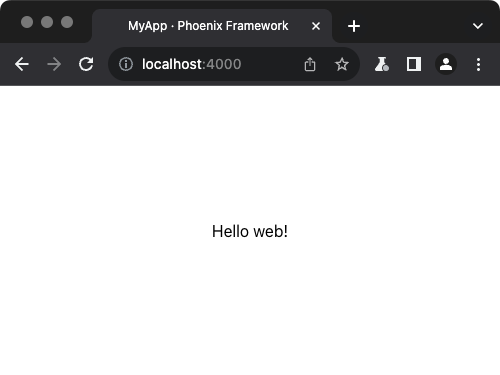
endThen, run your app and navigate to your local development server in a web browser. You should see the LiveView you created.
A native LiveView
To support non-web platforms using LiveView Native, simply provide a template for each
platform you want to support. This is done by extending LiveView's standard render/1 callback.
Each platform will have its own custom :format, render sigil and HEEx syntax, which are
all pulled in by the LiveViewNative.LiveView macro inherited toward the top of your LiveView.
The following example demonstrates handling the :swiftui platform for LiveView Native apps
with the :live_view_native_swiftui dependency, which covers iOS, iPadOS and macOS support:
# lib/my_app_web/live/hello_live.ex
defmodule MyAppWeb.HelloLive do
use Phoenix.LiveView
use MyAppWeb, :live_view
@impl true
def render(%{format: :swiftui} = assigns) do
# This UI renders on the iPhone / iPad app
~SWIFTUI"""
<VStack>
<Text>
Hello native!
</Text>
</VStack>
"""
end
@impl true
def render(%{} = assigns) do
# This UI renders on the web
~H"""
<div class="flex w-full h-screen items-center">
<span class="w-full text-center">
Hello web!
</span>
</div>
"""
end
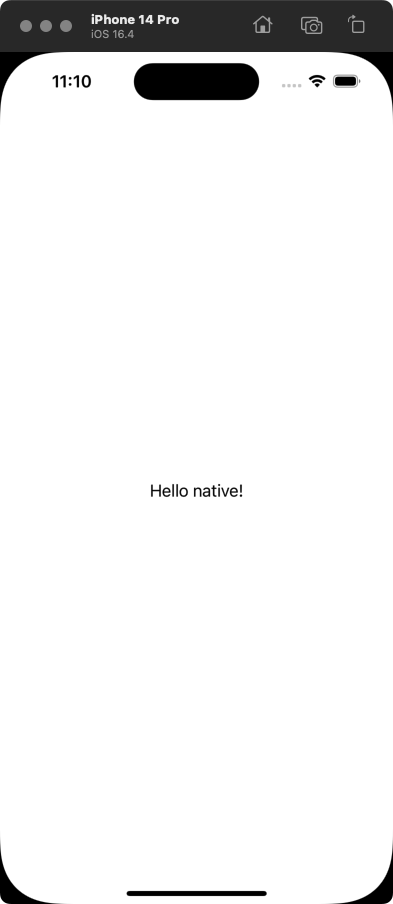
endLoading the native project at native/swiftui/MyApp/MyApp.xcodeproj and running it in
Simulator will render the native template as a native SwiftUI app:
If everything looks as it should, congratulations! Your app is now using LiveView Native to serve multiple platform-specific templates to both web and non-web clients.
What's next?
If you've reached this section of the guide, you should have a cursory understanding of LiveView Native, how to install it in an existing Phoenix project and how to write a basic "Hello World" LiveView that renders a different UI for web and non-web clients.
To use LiveView Native to its full potential, you will need to dig deeper into the following subjects:
- LiveView Native features and concepts
- Additional libraries for the platform(s) your app supports
- Building UIs for the platform(s) your app support
This guide will cover the first point in the pages to follow. For the other two, you will need to consult the relevant documentation, guides and supporting literature for the platform(s) you want your app to serve. Below are some recommended resources for the SwiftUI and Jetpack platforms:
SwiftUI
Covers iOS 16+, macOS 13+ and watchOS 9+.
Jetpack
Covers Android.