Organize Livebook Apps with folders
Copy MarkdownApp folders help you organize how apps are displayed on the /apps page of your app server. Use them to group deployed apps so everyone can quickly find what matters.
This guide walks you through creating folders and assigning apps to them.
1. Create an app folder
Inside Livebook Teams:
- Navigate to the Apps page of your Teams organization dashboard at
https://teams.livebook.dev
- Click New folder
- Give your folder a name and save it
2. Assign apps to folders during deployment
Inside Livebook:
- Open the notebook you plan to assign to a folder
- Click App settings in the sidebar
- In the Folder dropdown, choose a folder
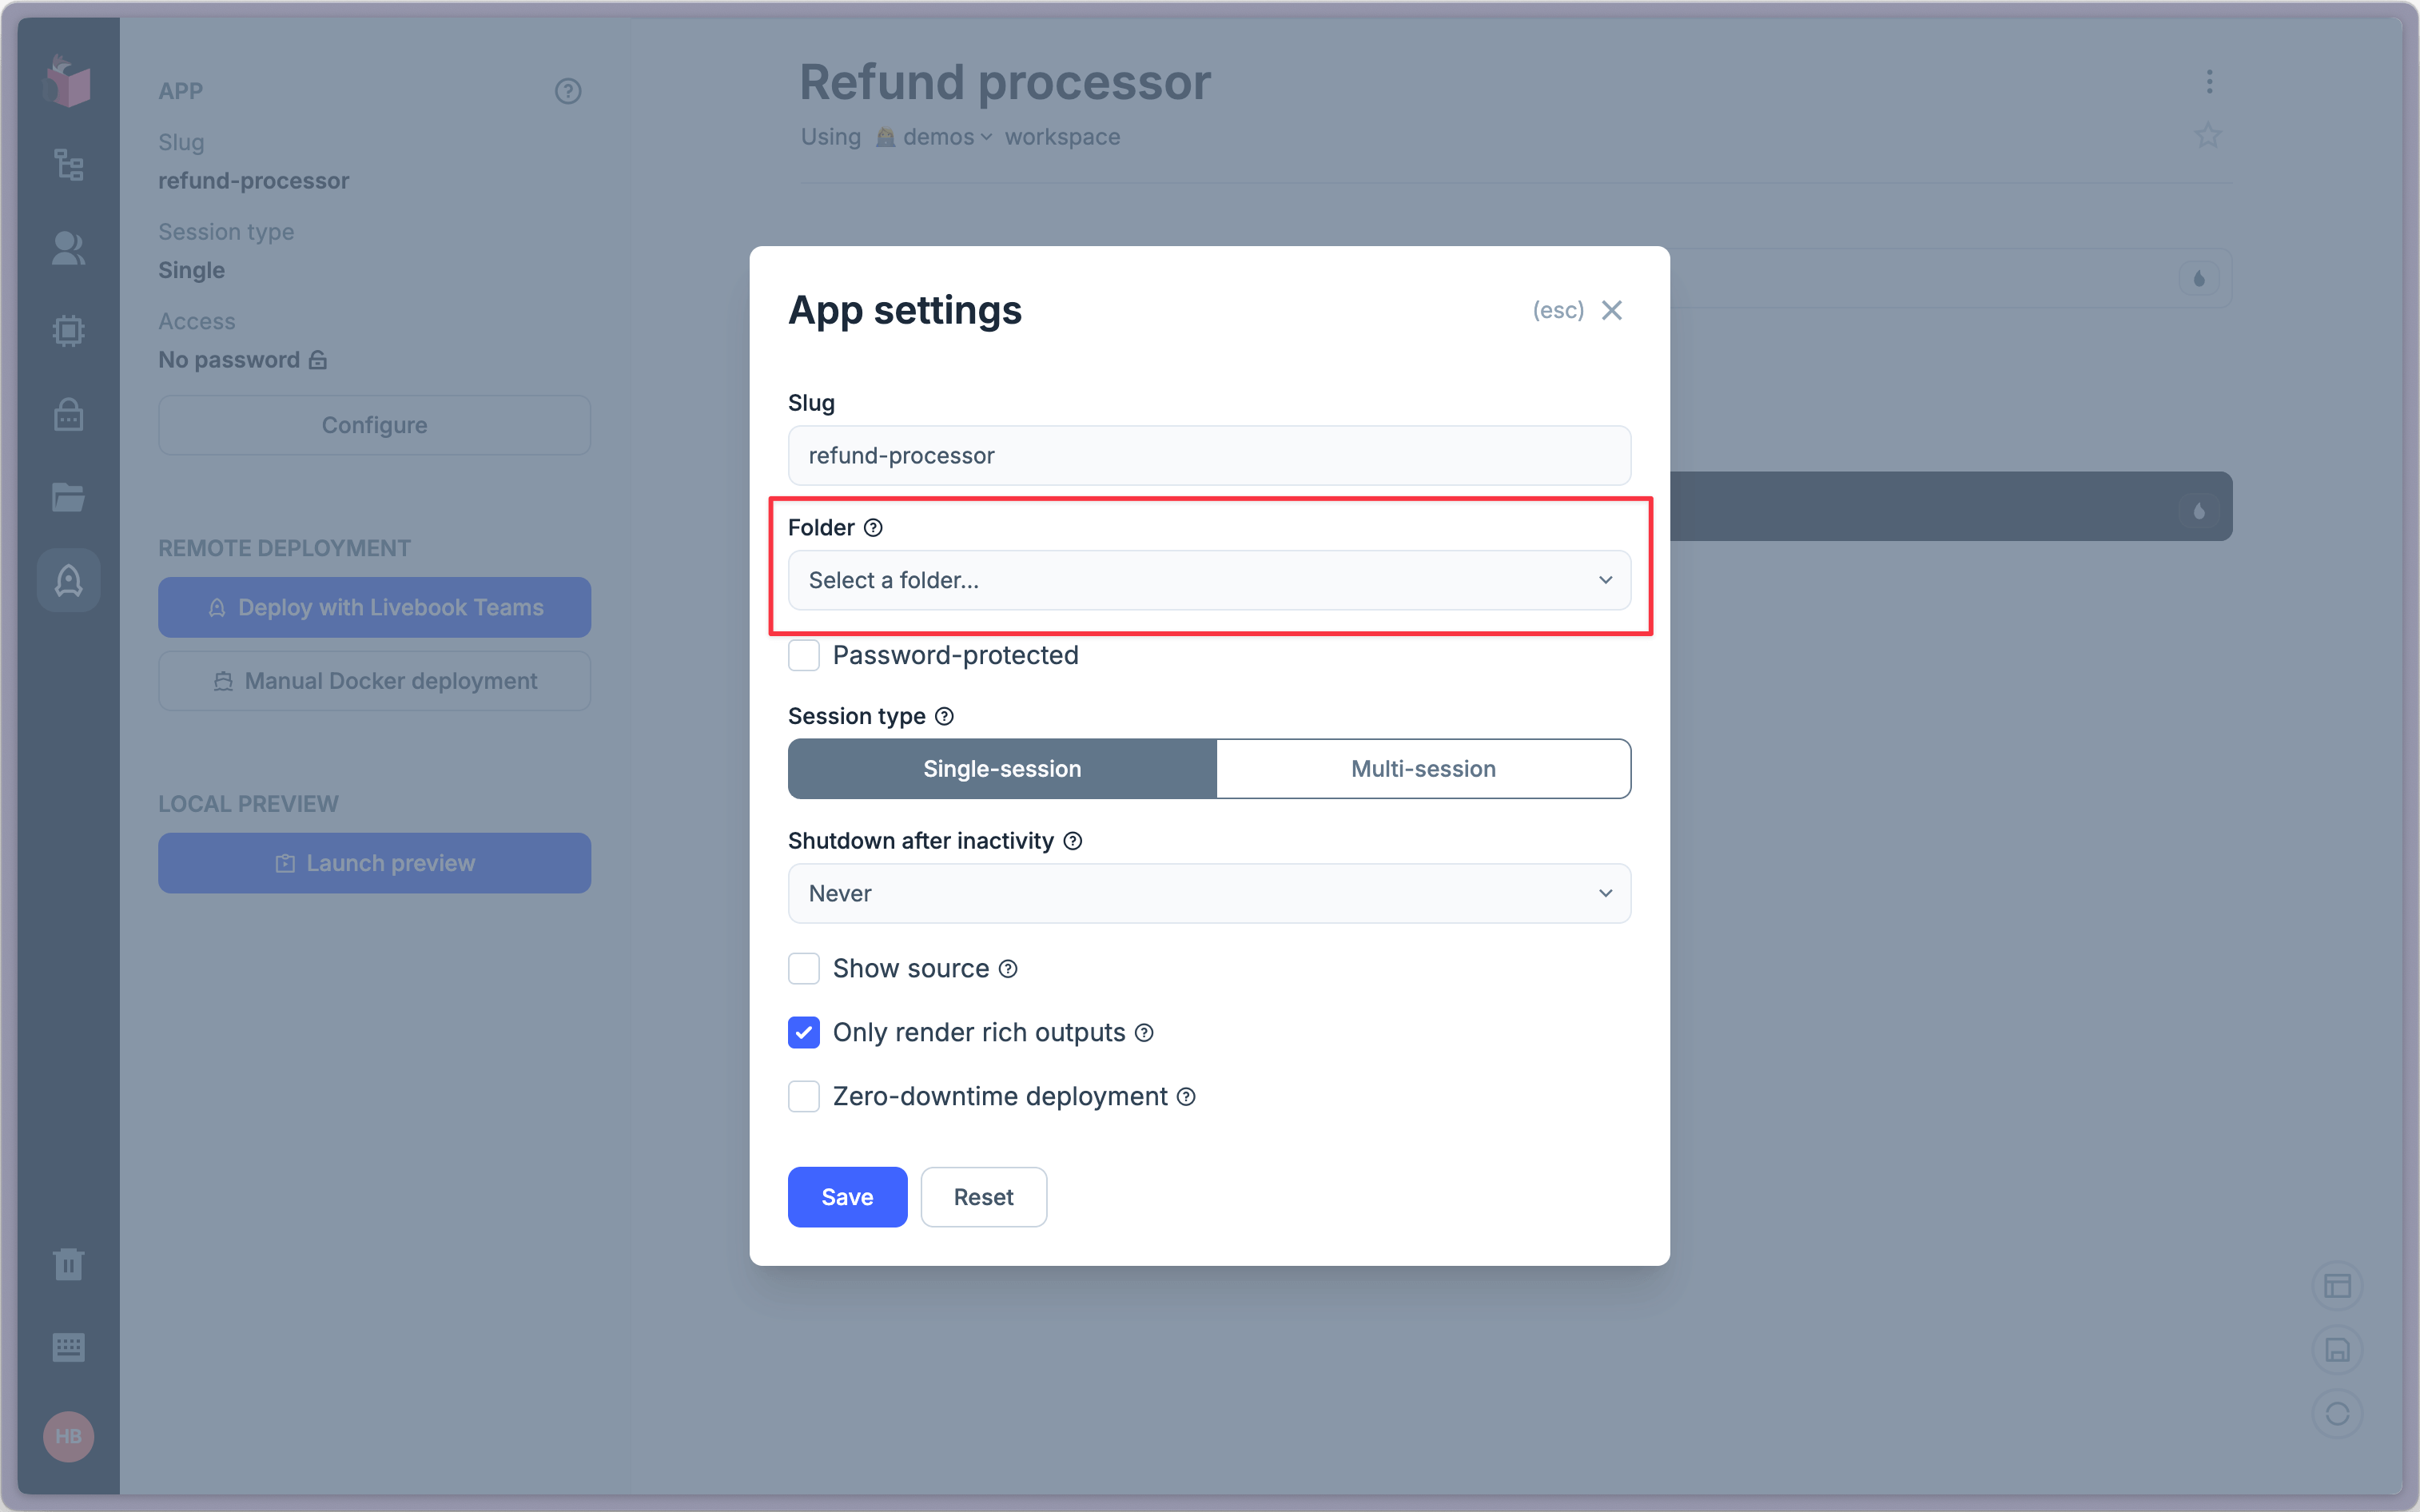
- Save the app settings
- Click Deploy with Livebook Teams to apply the new folder settings
The app will be placed in the selected folder once deployment completes. Until then, the folder assignment is only saved in the notebook's app settings.
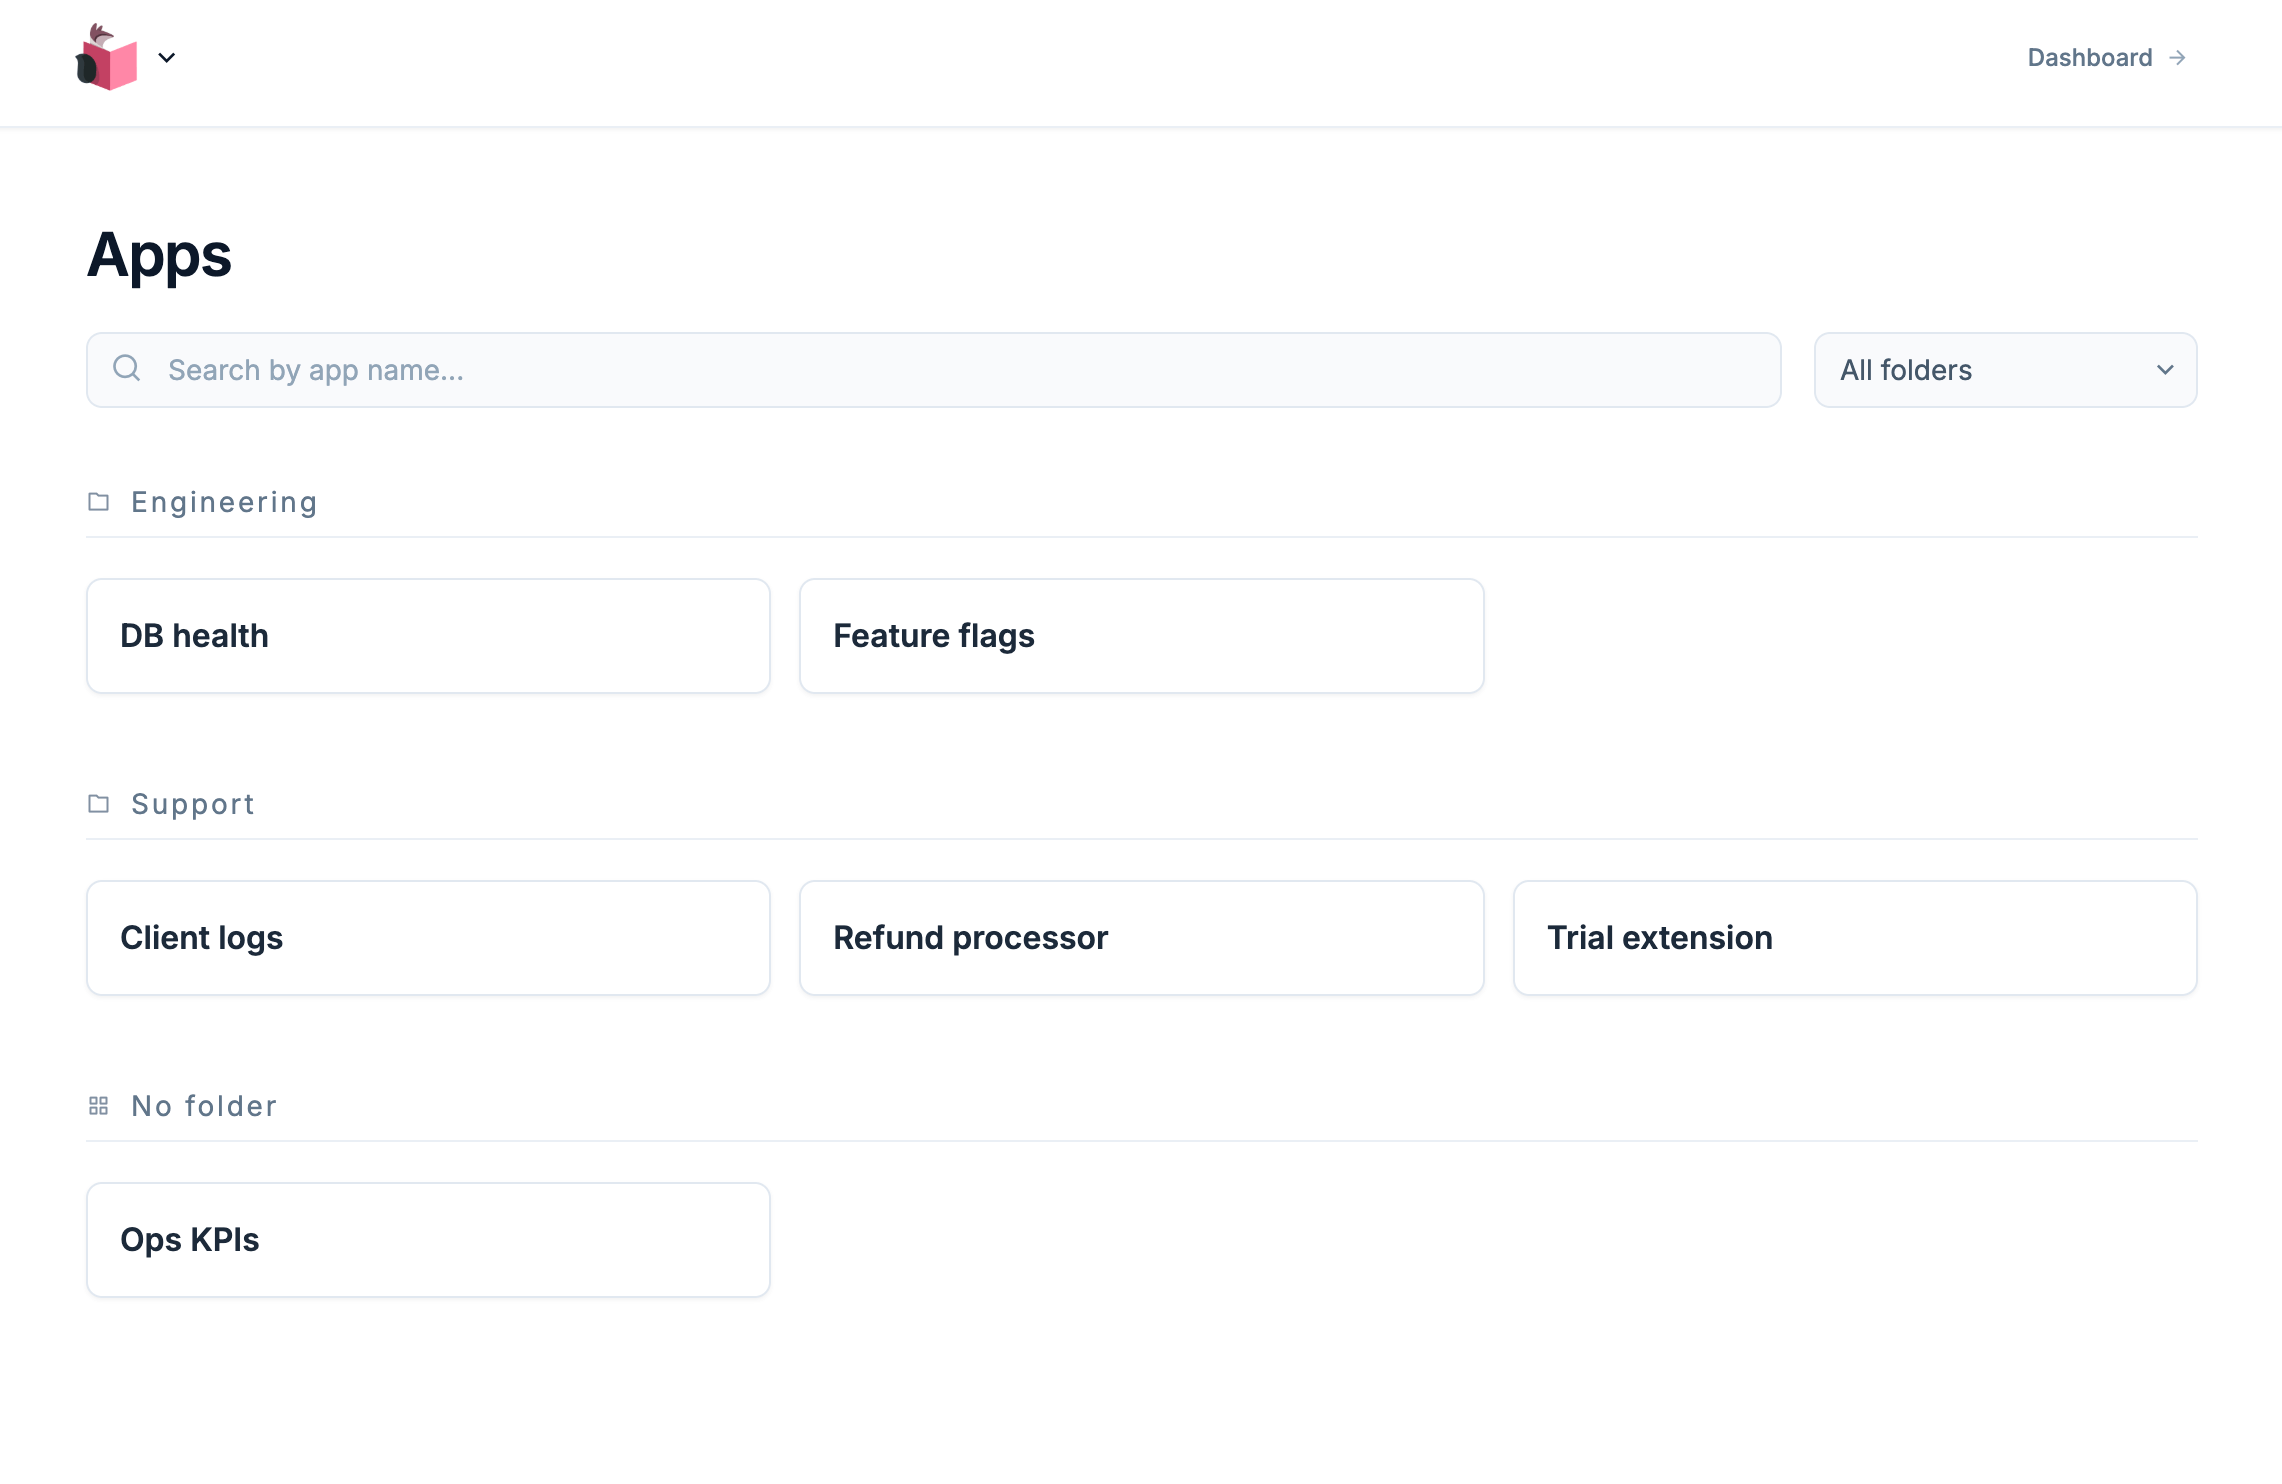
3. Browse and filter apps by folder
Once you create folders, the /apps page of your Livebook app server shows apps grouped by folder.
FAQ
I don't see the Folder dropdown in App settings, why?
Folders are only available for notebooks associated with a Teams workspace. Make sure your notebook is associated with a Teams workspace. To change this, open the notebook and update the workspace setting located directly below the notebook name.
Can I create folders from Livebook?
No. Folders are created in the Teams dashboard. Inside Livebook, you can pick from existing folders created inside your organization in Livebook Teams.
How to move an app to a different folder?
Open the notebook, change the folder, and redeploy the app.