OIDC SSO (OpenID Connect Single Sign-On)
Copy MarkdownLivebook Teams supports OpenID Connect (OIDC) Single Sign-On, allowing you to authenticate users through your existing Identity Provider (IdP) when they access your app servers and Livebook apps.
Livebook version requirement
Requires Livebook v0.18 or newer.
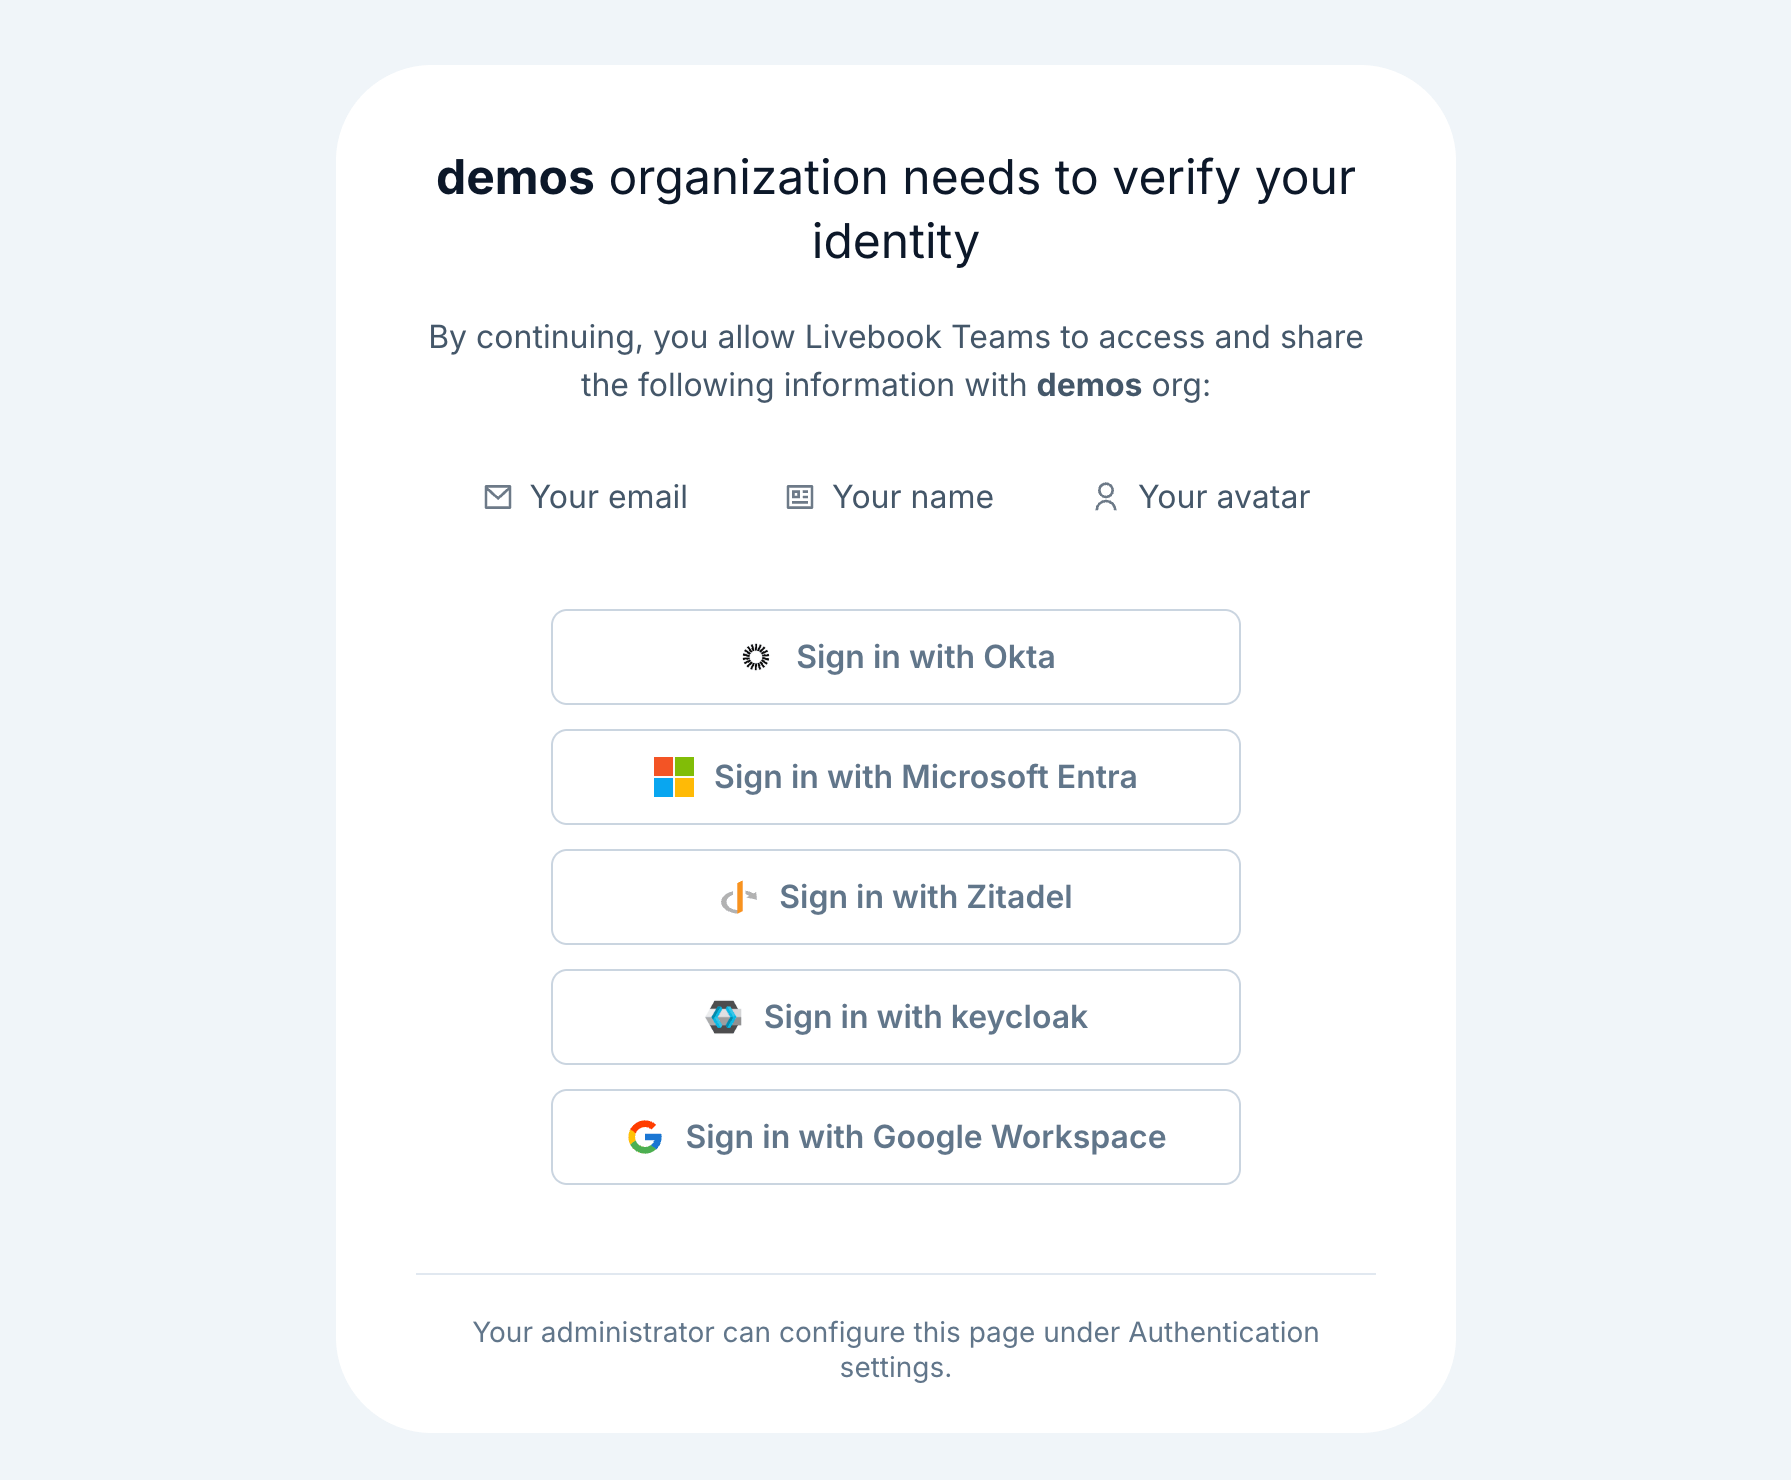
Demo
Here's a quick demo of the feature working.
1. OIDC configurations
To integrate Livebook Teams with your OIDC SSO provider, follow these steps.
OIDC IdPs
Follow these instructions if you're using Okta, Microsoft Entra, Keycloak or any other OIDC-compliant Identity Provider.
1.1 Register with your OIDC provider
Go to your IdP admin, and register Livebook Teams as a Relying Party (client/app). This is the info you’ll need from Livebook Teams:
- Redirect URI: The Livebook Teams sign-in callback URL that must be registered with your IdP:
https://teams.livebook.dev/identity/callbacks/oidc - Post Logout Redirect URI: The Livebook Teams URL that must be registered with your IdP to redirect users after logout:
https://teams.livebook.dev/identity/logout - Required OIDC scopes: The OIDC scopes Livebook Teams requires:
openid,profile,email,offline_access
Once that’s done, you should retrieve the following information from the registration process:
- Client ID: A unique identifier assigned to Livebook Teams by your IdP
- Client Secret: A confidential key assigned to Livebook Teams by your IdP
- Discovery URL: This is the OIDC metadata URL provided by your IdP. Usual format:
https://YOUR_IDP/.well-known/openid-configuration
1.2 Configure OIDC in Livebook Teams
- Log in to Livebook Teams
- Go to the Authentication panel (requires "admin" role in the organization)
- Click Add OIDC SSO and provide the following details:
- Name: A display name for your OIDC provider (e.g., Okta, Microsoft Entra, Keycloak)
- Discovery URL: Use the discovery URL retrieved from your IdP
- Client ID: Use the Client ID retrieved from your IdP
- Client Secret: Use the Client Secret retrieved from your IdP
- Enable this SSO provider: Make sure this option is enabled
- Save
Google Workspace
To configure OIDC SSO with Google Workspace, follow the steps below. You'll need a Google Workspace account with the super admin role.
1.1 Enable Cloud Identity API
- Go to the Google Cloud Console
- Select your project or create a new one if needed
- Navigate to APIs & Services > Library
- Search for Cloud Identity
- Select Cloud Identity from the results
- Click Enable
1.2 Create service account
- Navigate to IAM & Admin > Service Accounts
- Click Create Service Account
- Configure the service account:
- Service account name:
livebook-teams(or your preferred name) - Service account description: Service account for Livebook Teams to access Google Workspace groups
- Service account name:
- Click Create and Continue
- Skip the optional steps by clicking Continue and then Done
1.3 Get the unique ID of the service account
- In the Service Accounts list, click on the service account you just created
- In the Details tab, locate the Unique ID under the service account details
- Copy this Unique ID (you'll need it in the next step)
1.4 Create a JSON key for the service account
- While still on your service account page, go to the Keys tab
- Click Add Key > Create new key
- Select JSON as the key type
- Click Create
- The JSON key file will be downloaded automatically (save it securely)
1.5 Enable domain-wide delegation
- Go to your Google Workspace Admin Console (requires super administrator access)
- Navigate to Main menu > Security > Access and data control > API controls
- In the Domain wide delegation section, click Manage Domain Wide Delegation
- Click Add new
- Configure the delegation:
- Client ID: Paste the unique ID from step 1.3
- OAuth scopes: Enter the following scope (this grants read-only access to group information):
https://www.googleapis.com/auth/cloud-identity.groups.readonly
- Click Authorize
1.6 Configure Google Workspace OIDC in Livebook Teams
- Log in to Livebook Teams
- Go to the Authentication panel (requires "admin" role in the organization)
- Click Add OIDC SSO and provide the following details:
- Name: A display name for your OIDC provider (e.g., Google Workspace)
- Discovery URL:
https://accounts.google.com/.well-known/openid-configuration - Admin E-mail: Email address of a Super Admin user of your Google Workspace (e.g.,
admin@yourcompany.com). This user will be impersonated by the service account to read group memberships, but access is limited to the scopes authorized in step 1.5. - Allowed domains: Your Google Workspace domain(s), one per line if multiple (e.g.,
yourcompany.com) - Service Account JSON Key: Paste the entire contents of the JSON key file from step 1.4
- Enable this SSO provider: Make sure this option is enabled
- Save
2. Configure your deployment group to authenticate via Livebook Teams
To enable OIDC authentication, your deployment group must be configured to use authentication via Livebook Teams.
To do so, follow these steps:
- Log in to Livebook Teams
- Navigate to the Deployments panel
- Click Edit on the deployment group where you want to enable authentication
- Ensure that Authenticate via Livebook Teams is enabled
- Save your changes
Test the integration with your OIDC IdP
To verify the integration is working, follow these steps:
- Navigate to an application deployed in a deployment group configured for OIDC authentication.
- The app server will redirect you to Livebook Teams for authentication
- On the authentication page, you will see an option to sign in using your configured OIDC provider
- Click the name of your OIDC SSO configuration and follow the authentication steps provided by your IdP
- Once authentication is complete, the IdP will redirect you back to your app server, and you will be successfully signed in